- Auxiliary light / Led bar installation guide
- Auxiliary light installation on CANbus cars / Electric cars
- Does my car have CAN bus – and do I need a CAN bus decoder?
- XBB Dongle + Powerunit - complete installation guide
- Auxiliary light / Led bar selection guide
- Different ways of getting signal for auxiliary lights
- Led strip installation guide
- Led strip dimming and controlling
- Led strip selection guide
- Saving electricity in home lighting
- Caring instructions for flashlights and headlamps
- Guide how to store flashlights and headlamps
- Construction site lighting
- Work machine lighting guide
- Bicycle lighting
Led strip dimming and controlling

Dimming LED strips allows you to adjust the lighting to your mood and needs. Dimming can be done in two main ways:
- On the low voltage side (12-24V, so-called secondary side): the adjustment takes place between the transformer and the LED strip. This is especially suitable when you want to use wireless or easy-to-install dimmers. This installation can be done yourself
- On the 230V voltage (primary side): The dimmer is installed before the transformer at 230V voltage, e.g. a traditional dimmer that comes with a wall switch. Requires an electrician.
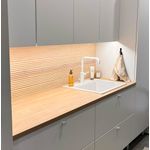 Led strips and accessories
 Led strip installation GUIDE
 Led strip selection GUIDE
LED strip dimming GUIDE
On the low voltage side (12/24V, do-it-yourself)
- Get the supplies: LED strip, aluminum profile, transformer and a dimmer or controller between them, e.g. a wireless receiver and remote control or a wired roller or push-button dimmer
- Install the strip in the desired location, see LED strip installation guide
- Connect the components as follows: 230V → transformer → dimmer → LED strip
- Transformer to a socket or permanently connected to the mains
- Dimmer or controller after the transformer
- Led strip as an extension of the dimmer
- (If you use a wireless remote control or phone control, pair the devices according to the instructions for the controller in question and test the functionality)
- Test the functionality of the strip and dimming
230V voltage (primary side, TRIAC dimming)
- Get the accessories: LED strip, aluminum profile, DIMMABLE transformer and the desired dimmer or controller, e.g. a push-button dimmer that comes with a wall switch, smart controller or a rotating TRIAC dimmer
- Install the strip in the desired location, see LED strip installation guide
- Connect the components as follows: 230V → wall dimmer → dimmable transformer → LED strip
- Fixed 230V power to the wall dimmer or switch
- Transformer after the dimmer
- LED strip after the transformer
- Test the operation of the dimming and connections
Low-voltage dimming (secondary side)
As mentioned, in low-voltage dimming, the adjustment takes place between the transformer and the LED strip, typically in systems operating at 12V or 24V DC. This method is particularly suitable for situations where wireless control solutions are desired or when the installation location does not allow for a dimmer mounted on a wall switch. This method is most commonly used in retrofit lights in conjunction with a socket transformer, but it is also suitable for fixed lighting solutions. The wireless controllers or smart controllers controlled by phone that are available today allow for very versatile installations and adjustment of the strip for every application.
Implementation methods
- Wireless dimmers: These systems consist of a receiver that is installed between the transformer and the LED strip, and a wireless controller, such as a remote control, wall button or, nowadays, even a smartphone.
- Wired dimmers: These are installed directly between the LED strip and the transformer, and they allow you to adjust the brightness of the light, for example with a rotating roller or push button.
Advantages
- The connection is made on the low-voltage side, meaning that all connections can be made by yourself without an electrician
- Low-voltage dimmers are often easier to install afterwards without major electrical installation work
- Wireless solutions offer flexibility and very versatile adjustment options for strip control
230V side dimming (primary side)
In primary side dimming, the adjustment takes place before the LED strip transformer, directly at 230V voltage, meaning the dimmer is installed directly on the wall switch (also the traditional rotating dimmer). The most common method is so-called TRIAC dimming, which uses a phase dimmer (TRIAC). This method requires a dimmable transformer that is designed to work with a TRIAC dimmer. Nowadays, TRIAC dimmers are also available in smart versions that can be controlled by phone.
230V dimming is most commonly used in new construction and renovation projects, where LED strips and their control can be installed as part of the home's fixed lighting. The end result is very neat and the LED strips can be controlled directly from the wall switch, like other lights.
Primary side dimming requires an electrical professional to perform the installation, as the connections are made at 230V. Primary dimming also requires some planning so that the necessary wires can be drawn to the wall switches and the installation location of the LED strips.
Shop reviews
4.6
number of ratings 168072- Mycket hjälpsamt ...Mycket hjälpsamtF K 13.11.2026

0
0
- Smidigt...SmidigtMikael B 13.11.2026
0
0
- Helppo, halpa ja laadukas....Helppo, halpa ja laadukas.A S 13.11.2026

0
0
- Rask levering og alltid bra pakket inn. 10/10...Rask levering og alltid bra pakket inn. 10/10Daniel H 12.11.2026

0
0
- Nopea toimitus...Nopea toimitusT R 12.11.2026
0
0
- Kiitettävästi...KiitettävästiM K 12.11.2026
0
0
- Jag undrade om det fanns klara stenskotts skydd till lamporna och fick svar direkt att det fanns ...Jag undrade om det fanns klara stenskotts skydd till lamporna och fick svar direkt att det fannsK L 12.11.2026
0
0
- Fungerade klockrent...Fungerade klockrentK L 12.11.2026
0
0
- rask levering...rask leveringKai roger E 12.11.2026
0
0
- Fed netbutik hvis man er fuckt up med lys som jeg. ...Fed netbutik hvis man er fuckt up med lys som jeg.Bjørn K 12.11.2026

0
0