- Auxiliary light / Led bar installation guide
- XBB Dongle + Powerunit - complete installation guide
- Auxiliary light / Led bar selection guide
- Different ways of getting signal for auxiliary lights
- Led strip installation guide
- Led strip dimming and controlling
- Led strip selection guide
- Saving electricity in home lighting
- Caring instructions for flashlights and headlamps
- Guide how to store flashlights and headlamps
- Construction site lighting
- Work machine lighting guide
- Bicycle lighting
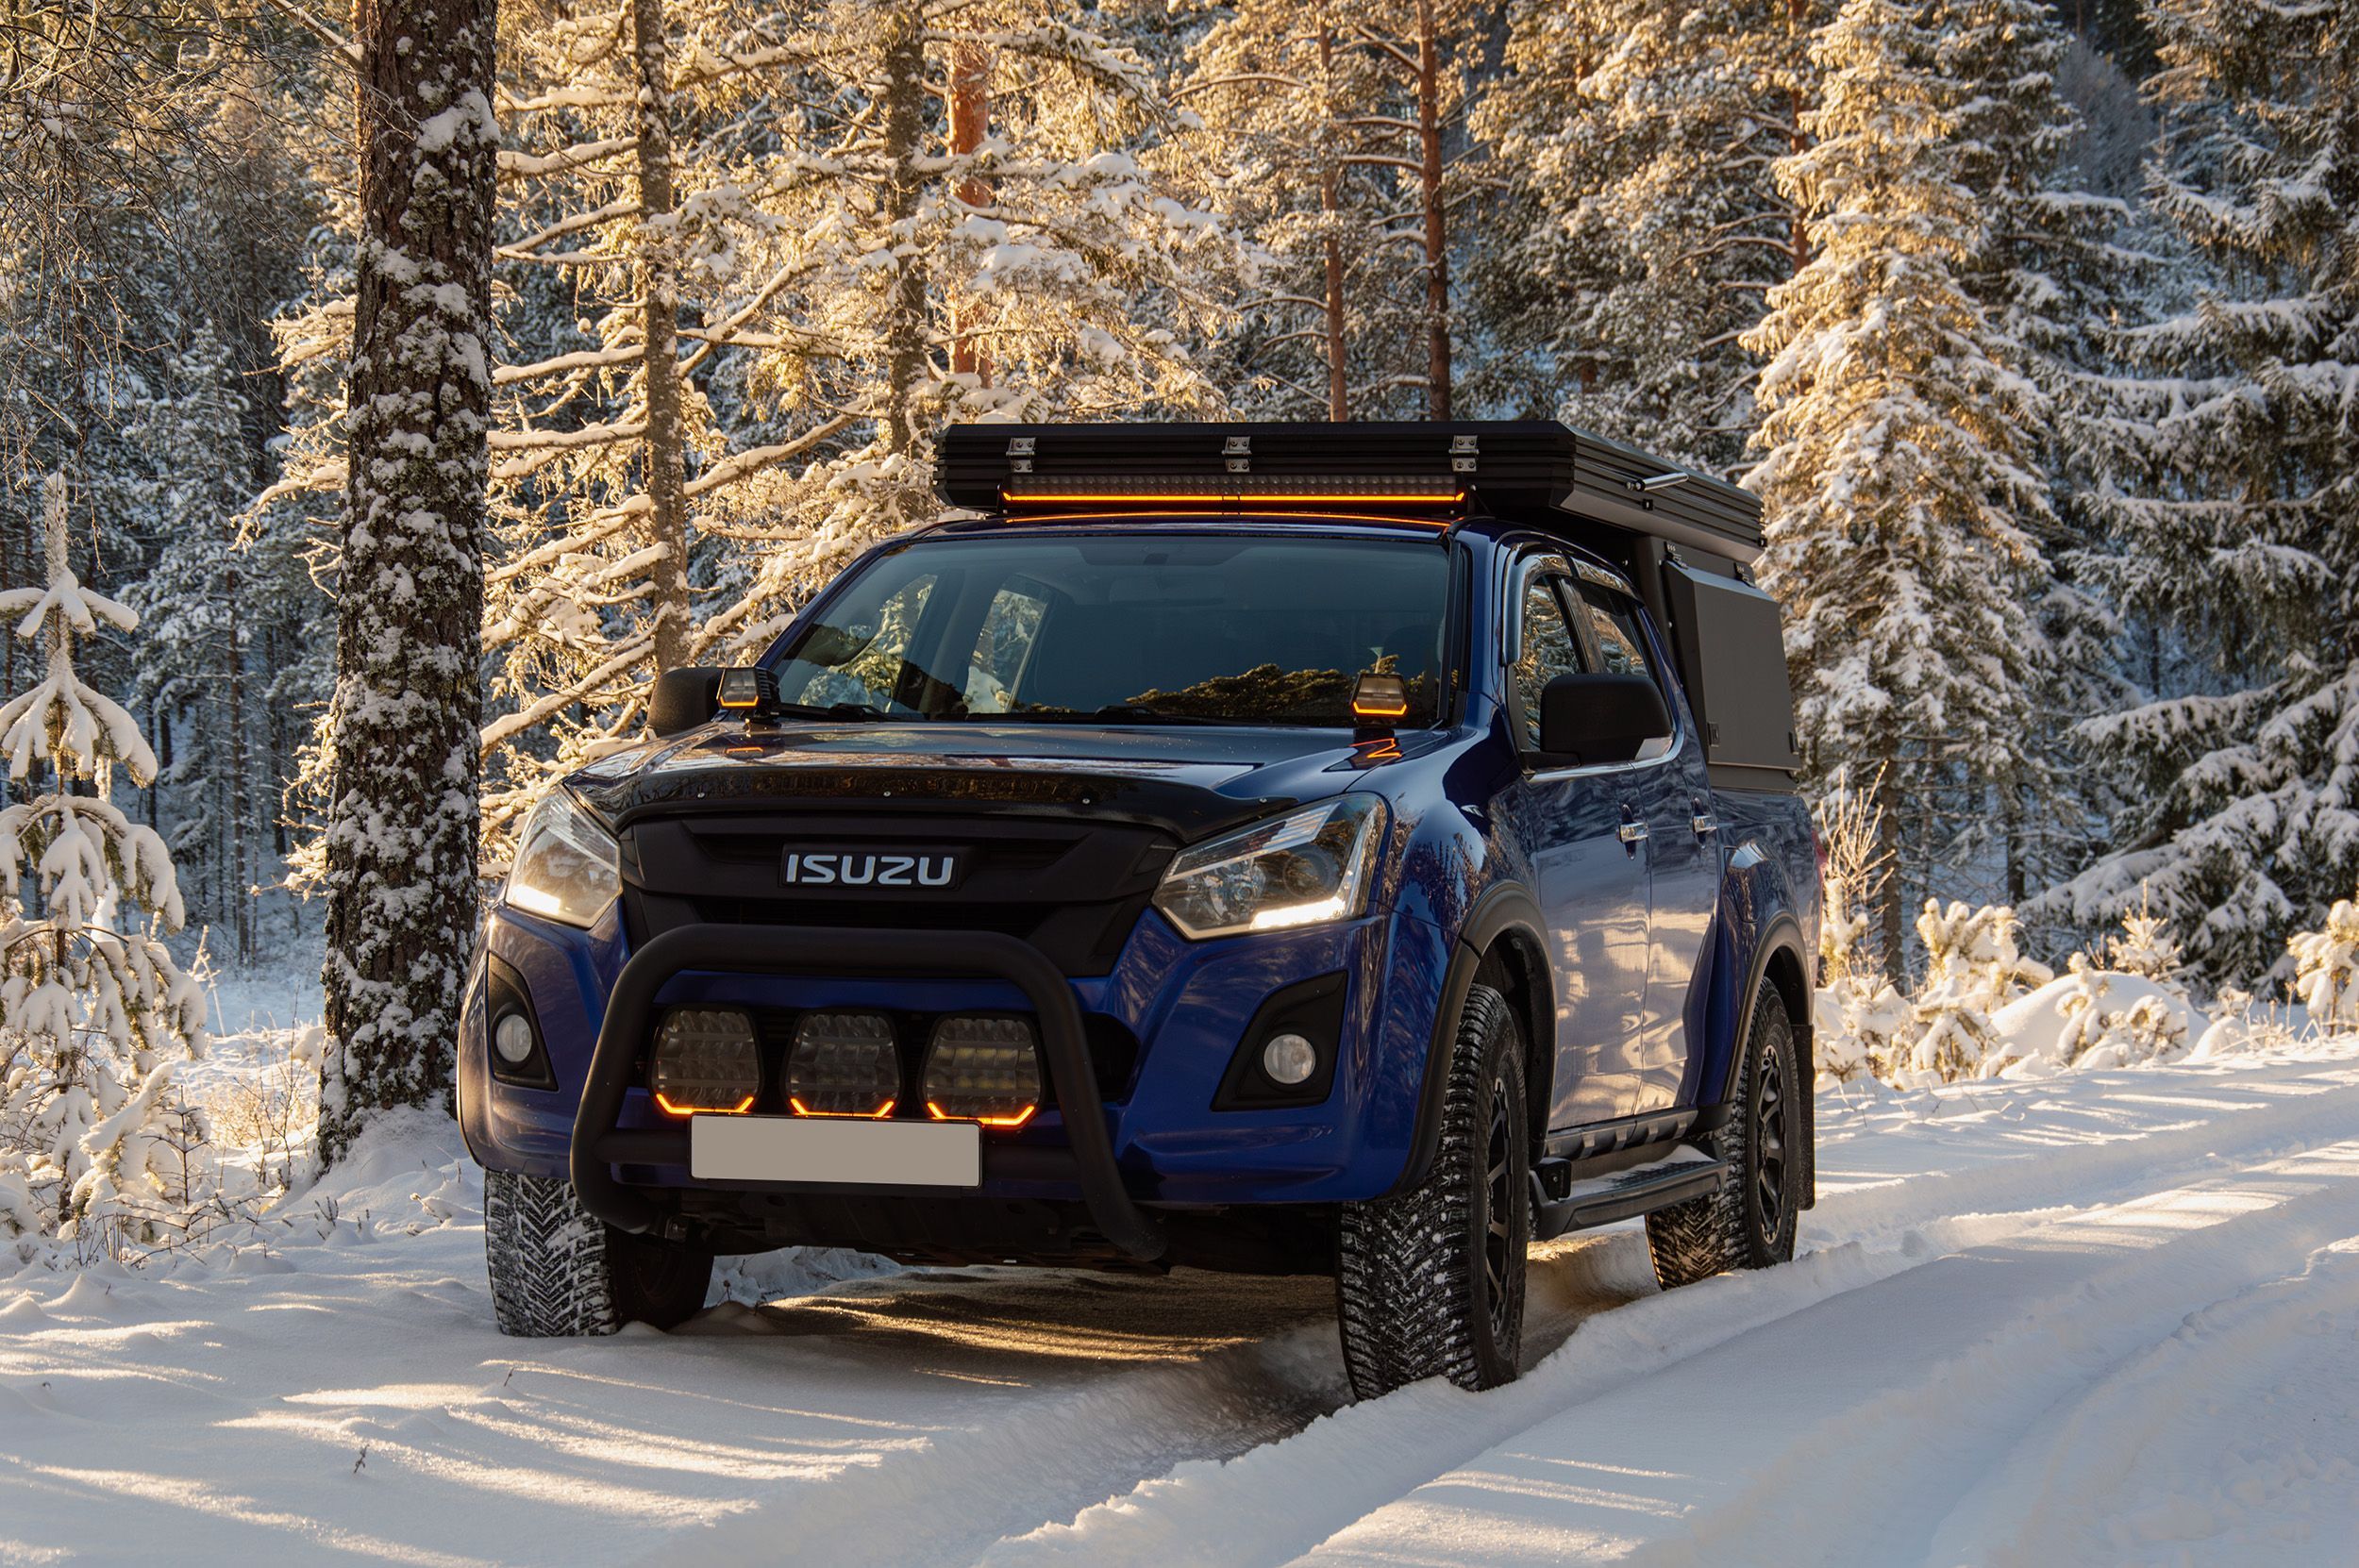
Auxiliary light / Led bar installation guide
We get a lot of questions: How do you install auxiliary lights or led bars? How do you connect auxiliary lights? In this article you will find the answers to these hot questions. The instructions will go through the installation and connection of auxiliary lights step by step.
Installing auxiliary lights is easy. If you know how to use a drill and a multimeter, the job should be easy. So, in normal installation, it is not a difficult task!
We have put together instructions in this article that will help you install additional lights and have them light up at the same time as the car's own lights. The connection does not load the fuses or wires of the original lights, and is therefore a safe solution.
Required parts and tools
Valostore offers a complete set for almost every light, which includes a suitable relay wiring harness for the light in addition to the light itself, as well as a suitable bracket for the light that goes behind the license plate. Of course, you can also buy the parts separately if you wish.
Lights / installation accessories:
- Additional light(s)
- Relay wiring harness
- Bracket
- Support bars, necessary for heavy and/or high lights.
Tools / accessories:
- Multimeter (for finding the excitation wire)
- Drill/screwdriver (for removing the plate, attaching the plate bracket)
- Pliers (for connections and cutting cable ties)
- Wrench/ring wrench/socket set (for attaching the bolts and wires of the additional light)
- Cable ties (for attaching wires, bundling extra wires)
- Screws (for attaching the plate bracket)
Installing the additional light
Once you have the necessary parts and tools, you can move on to the installation itself. The instructions begin by going through how to attach the additional light, then move on to connecting the wires.
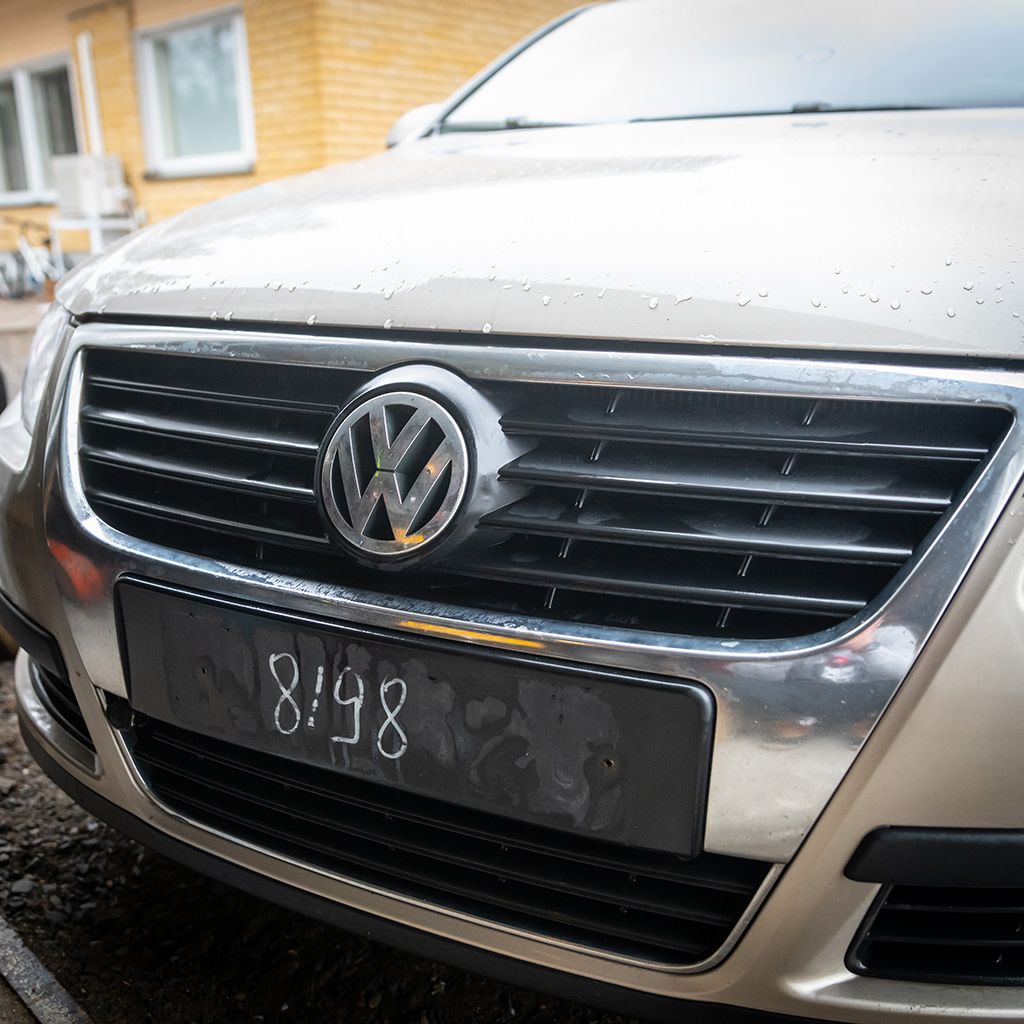
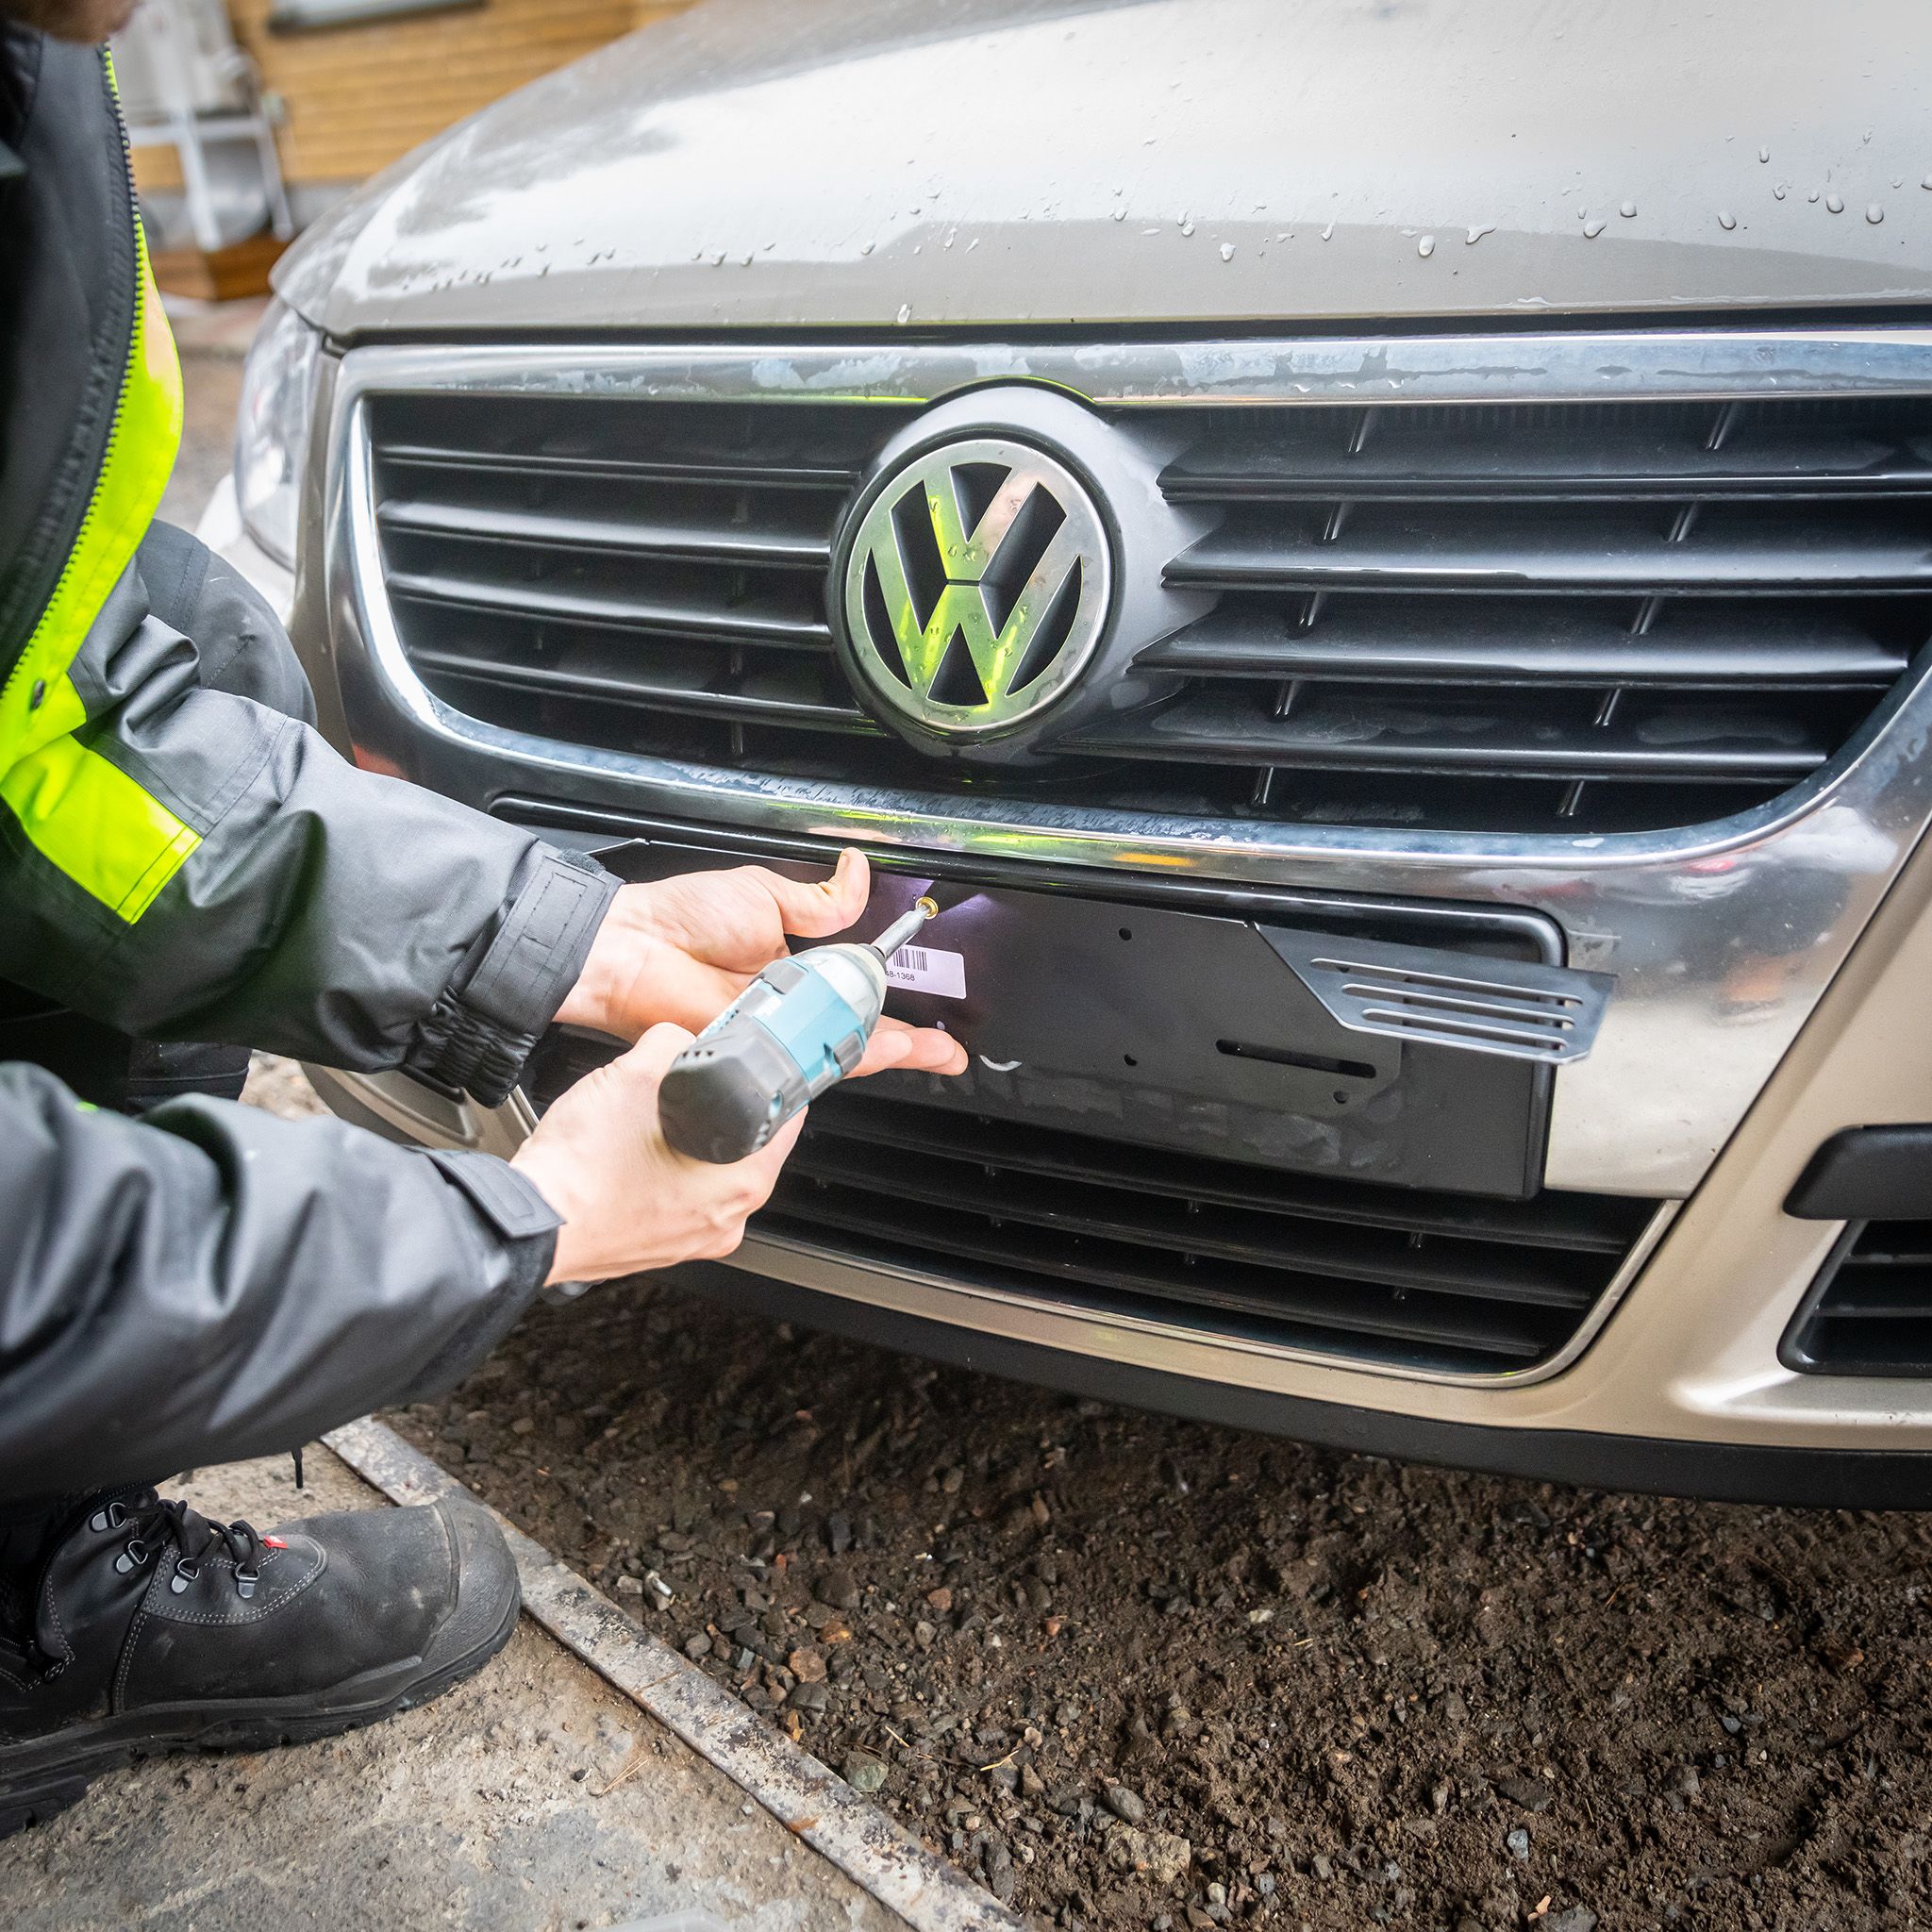
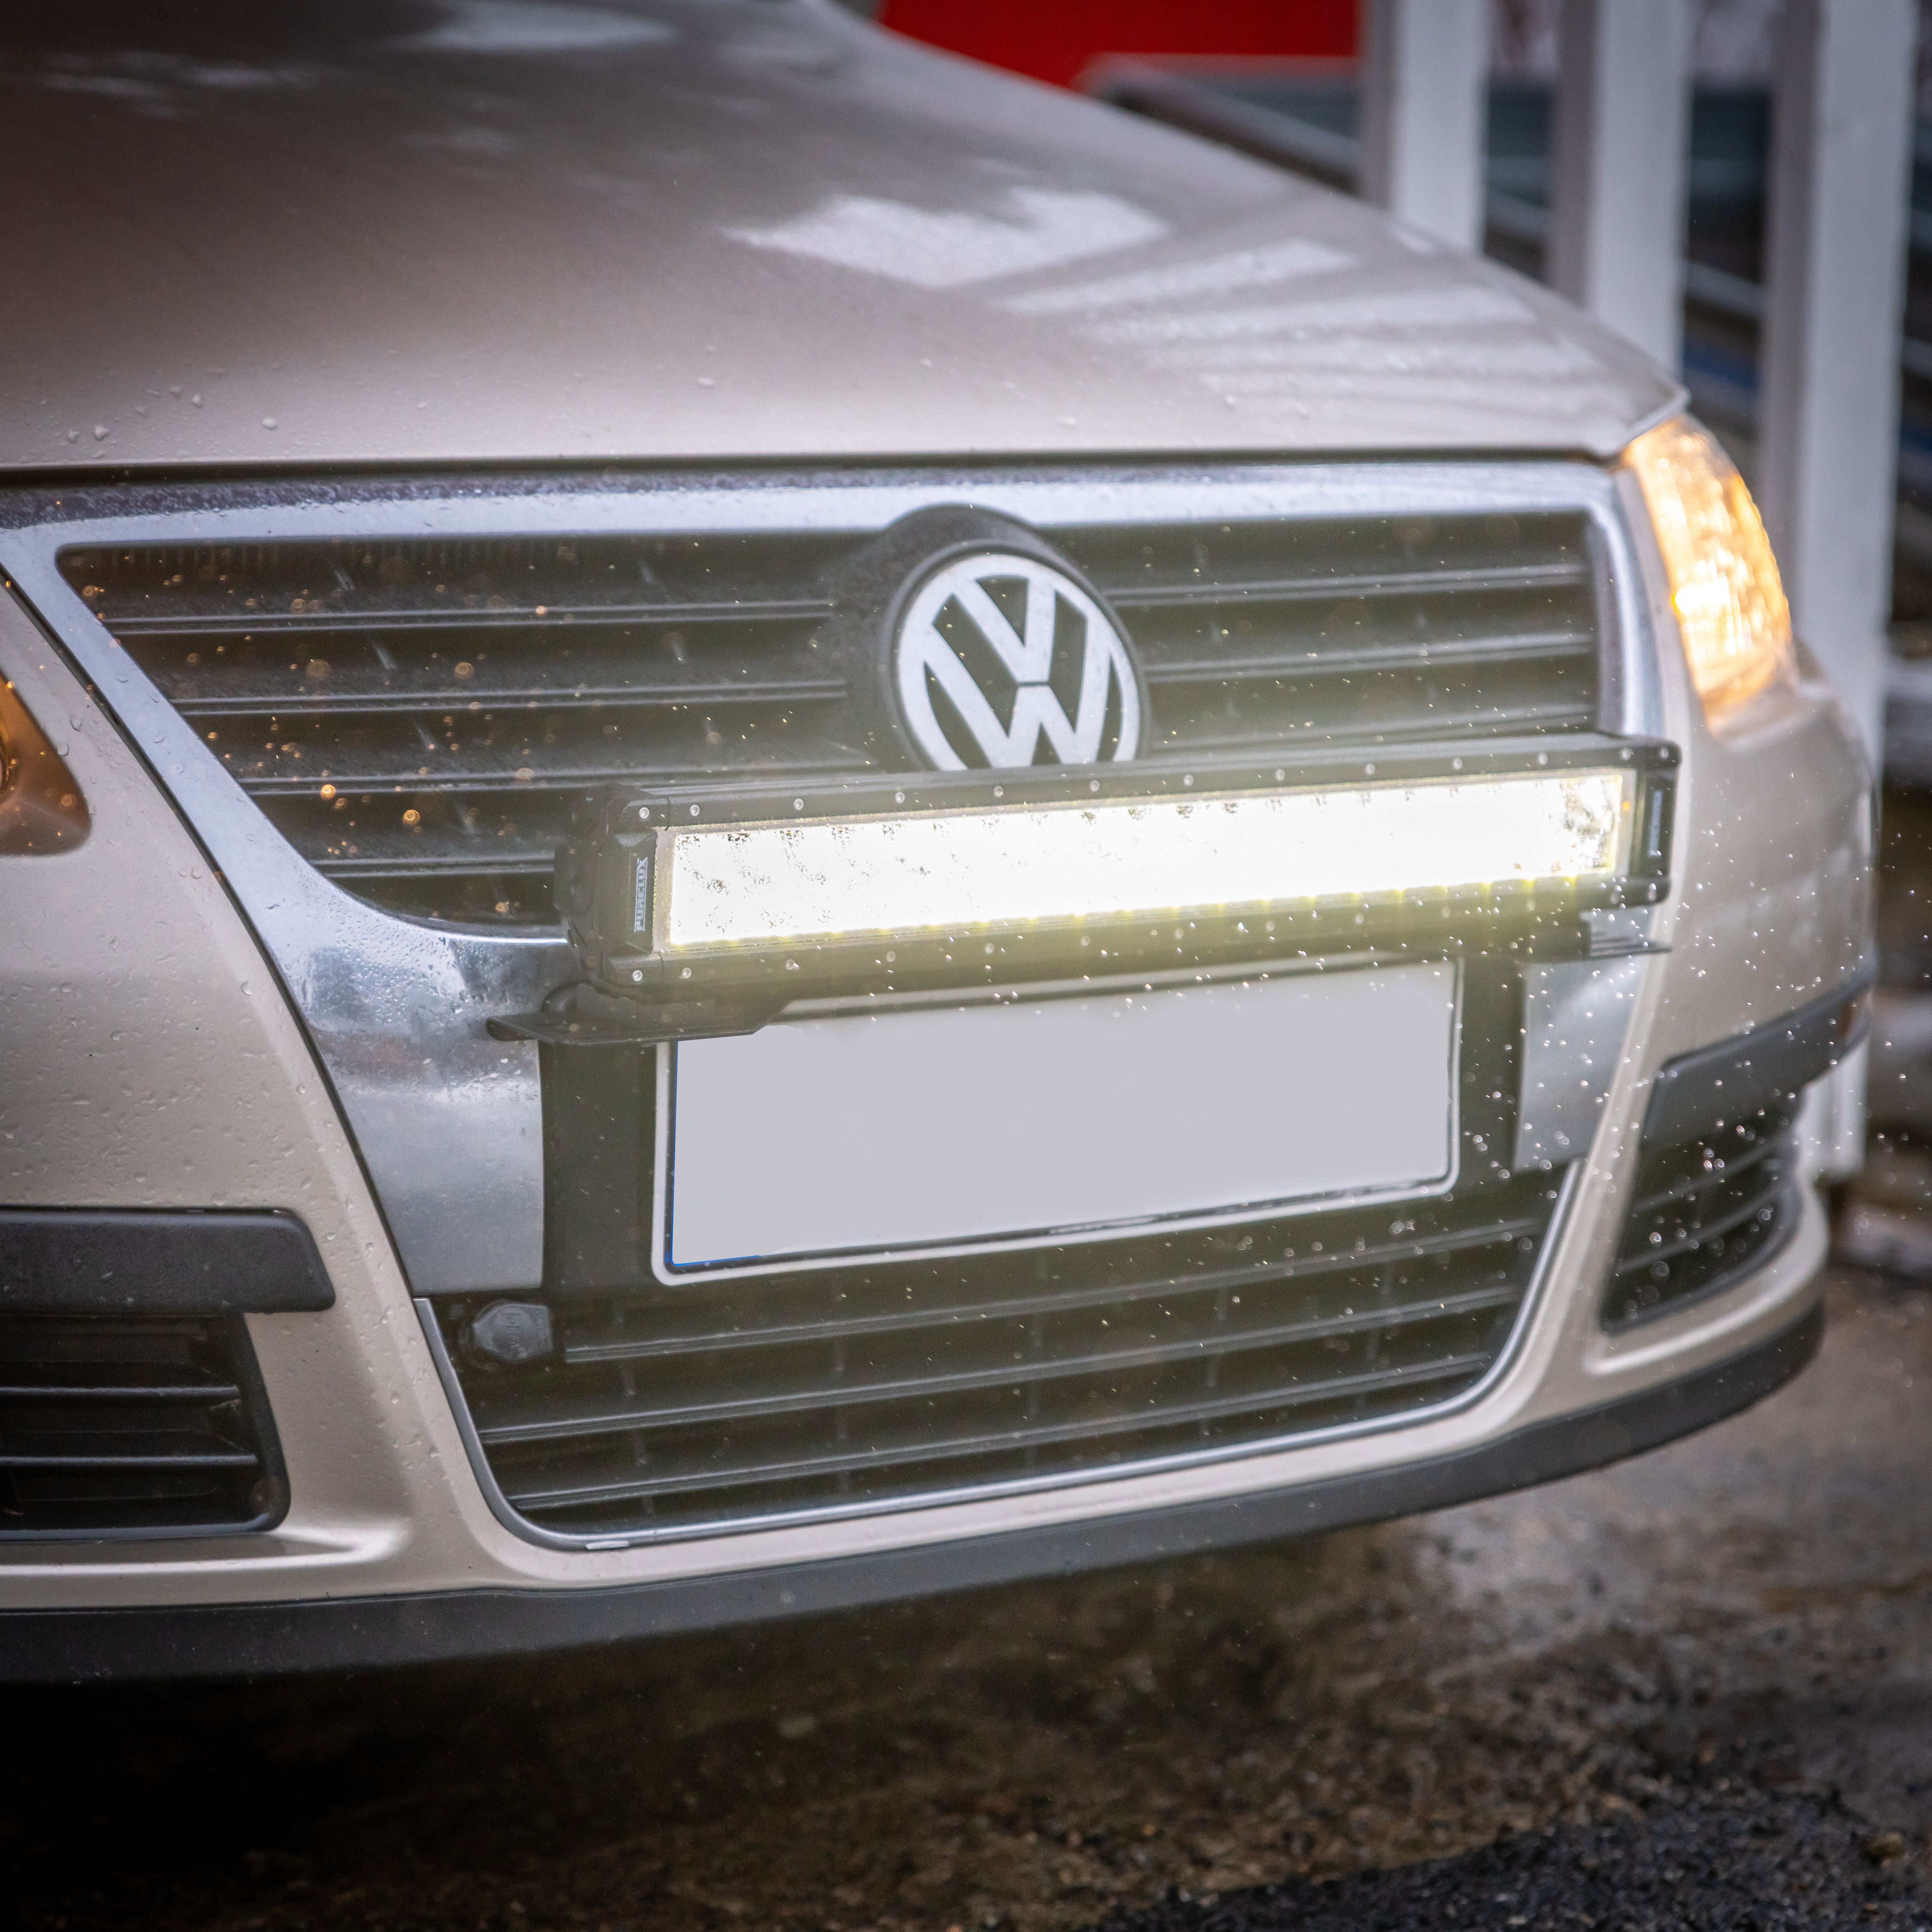
1. Mounting the bracket
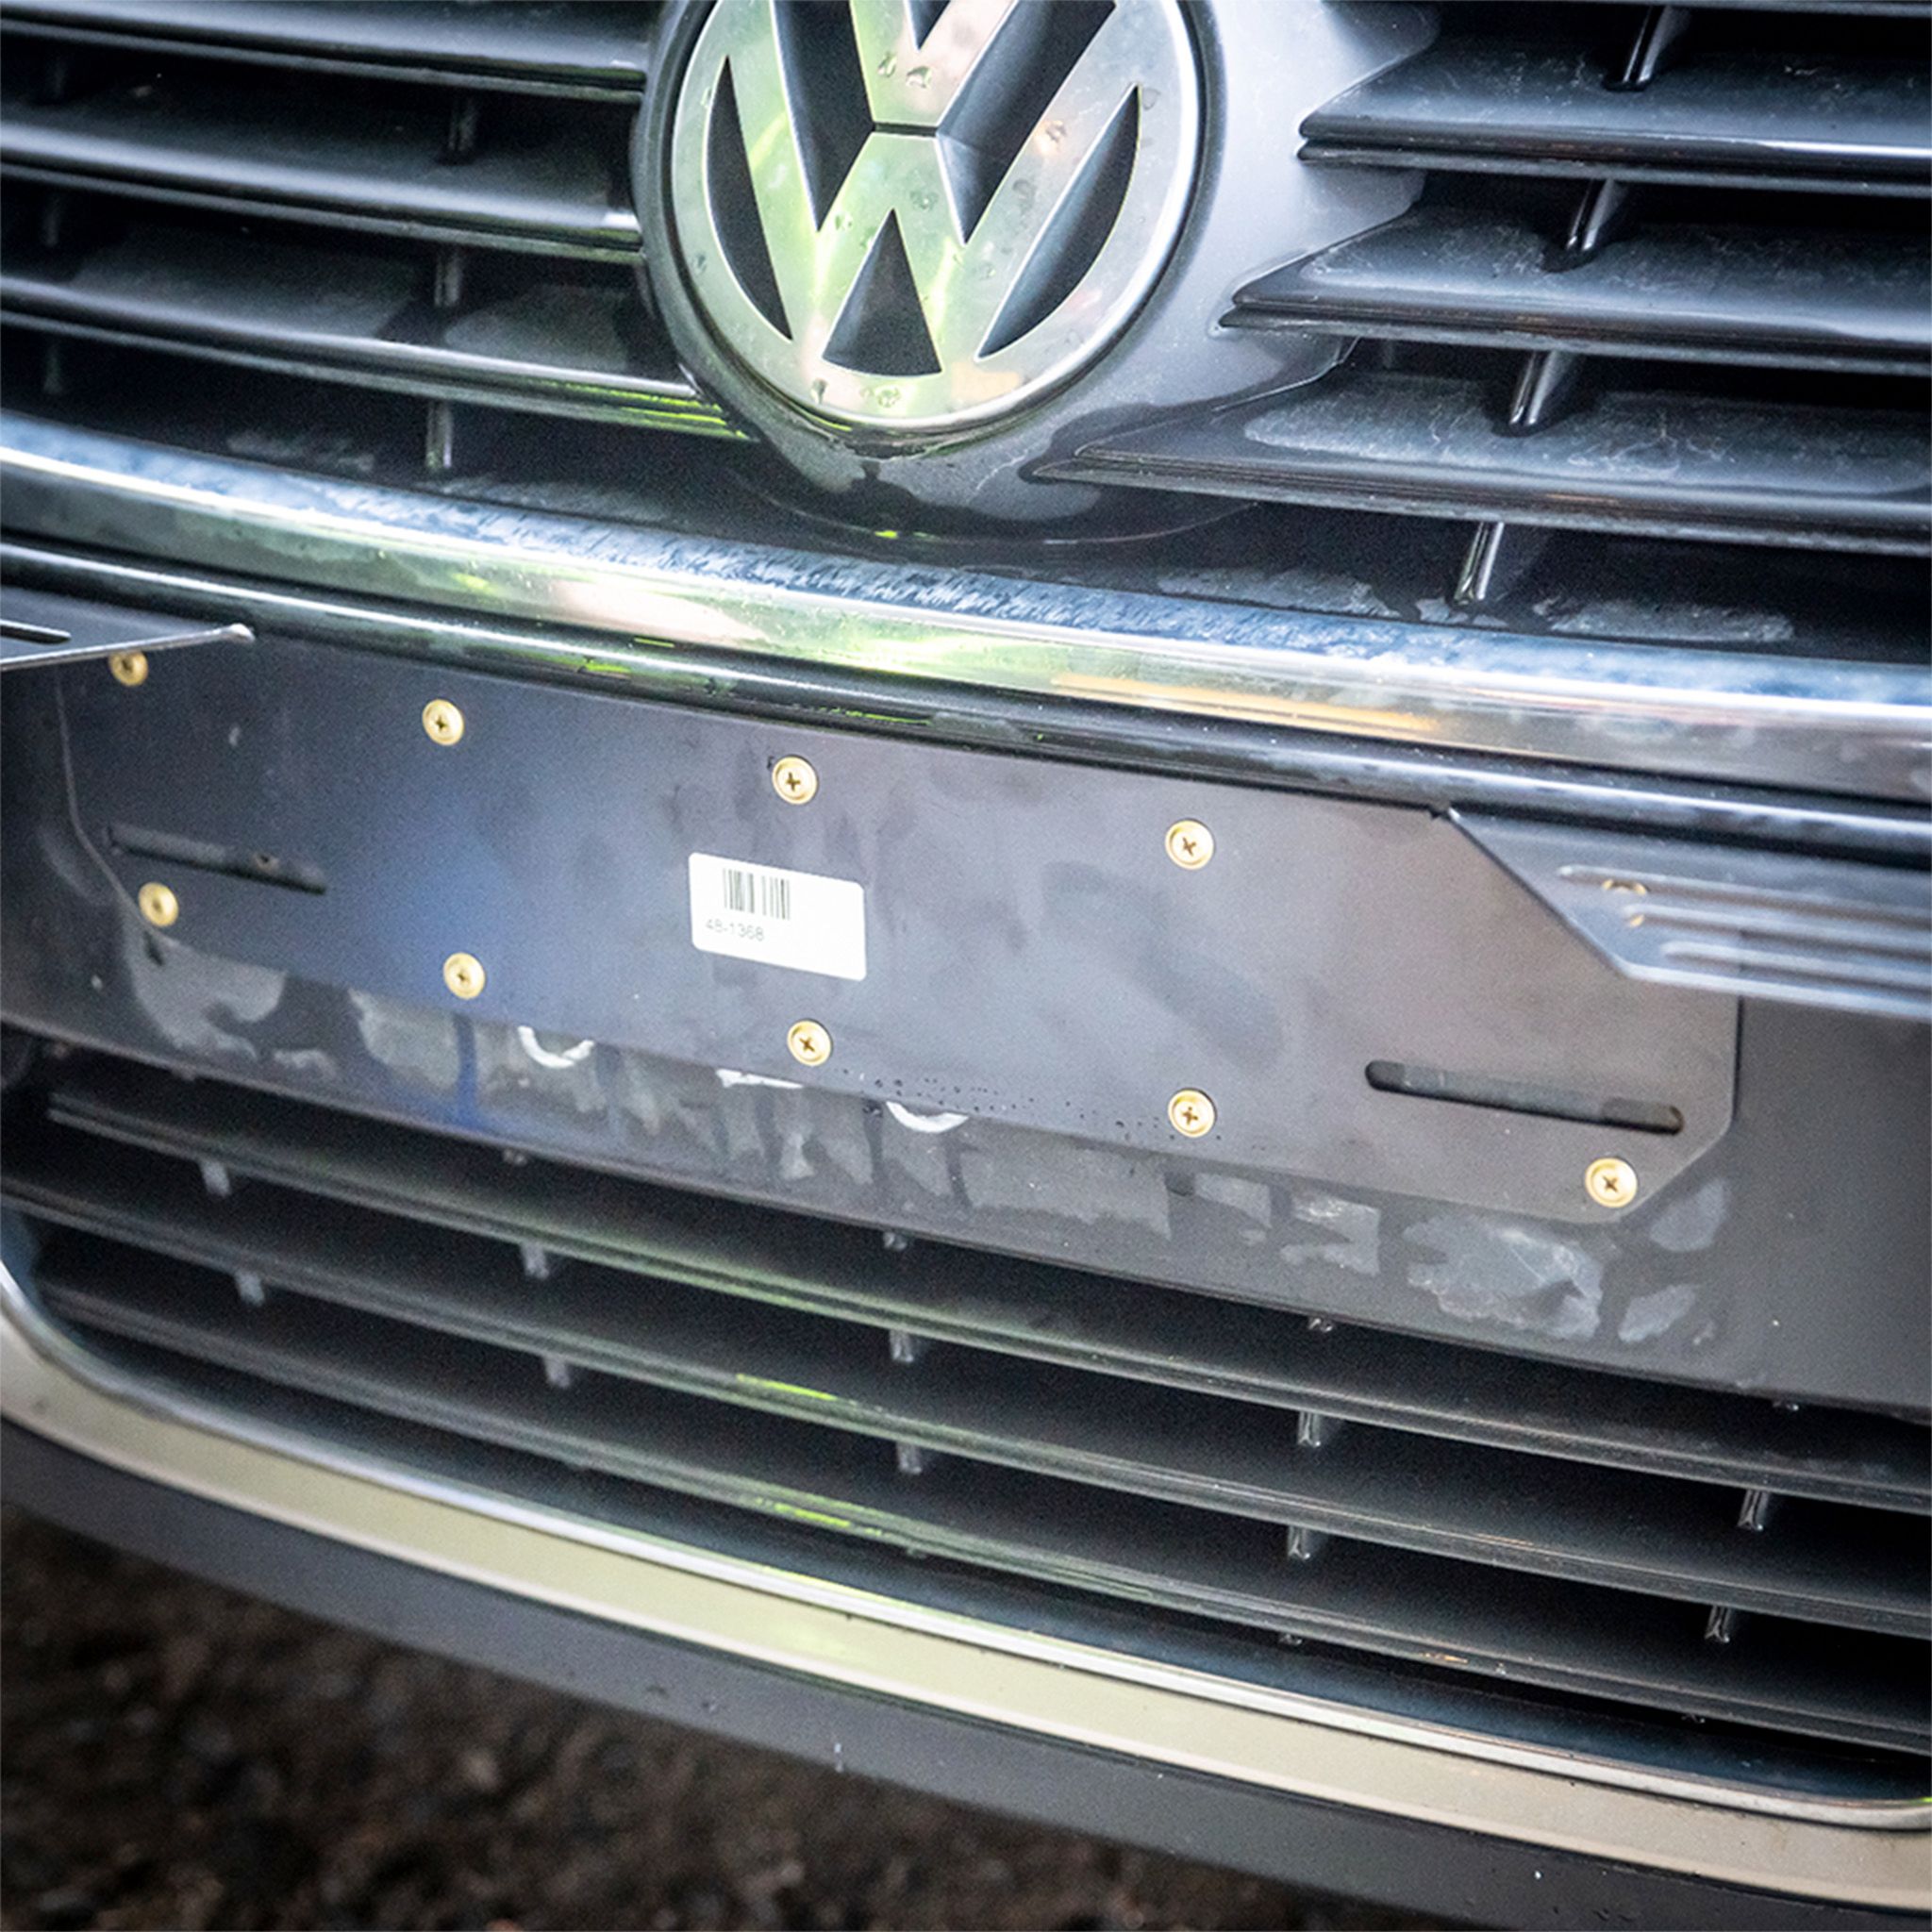
Remove the license plate (and any license plate frame). Clean the paint underneath the plate, and place the bracket in place of the license plate. Screw the bracket in place. You can also make the installation easier by marking the points where the screws will be attached, for example with a marker. Then remove the bracket from its place and drill a small pre-hole for the screws, so that they are easier to screw in. Then place the bracket back in place and secure it with screws.
NOTE! It is important to attach the bracket as firmly as possible to minimize the lights from wobbling. The screws should be drilled in at least every corner, preferably also in the middle. Finally, make sure that the bracket is securely attached.
TIP! Any white "caps" on the mounting screws can be easily removed with a knife or flat-head screwdriver.
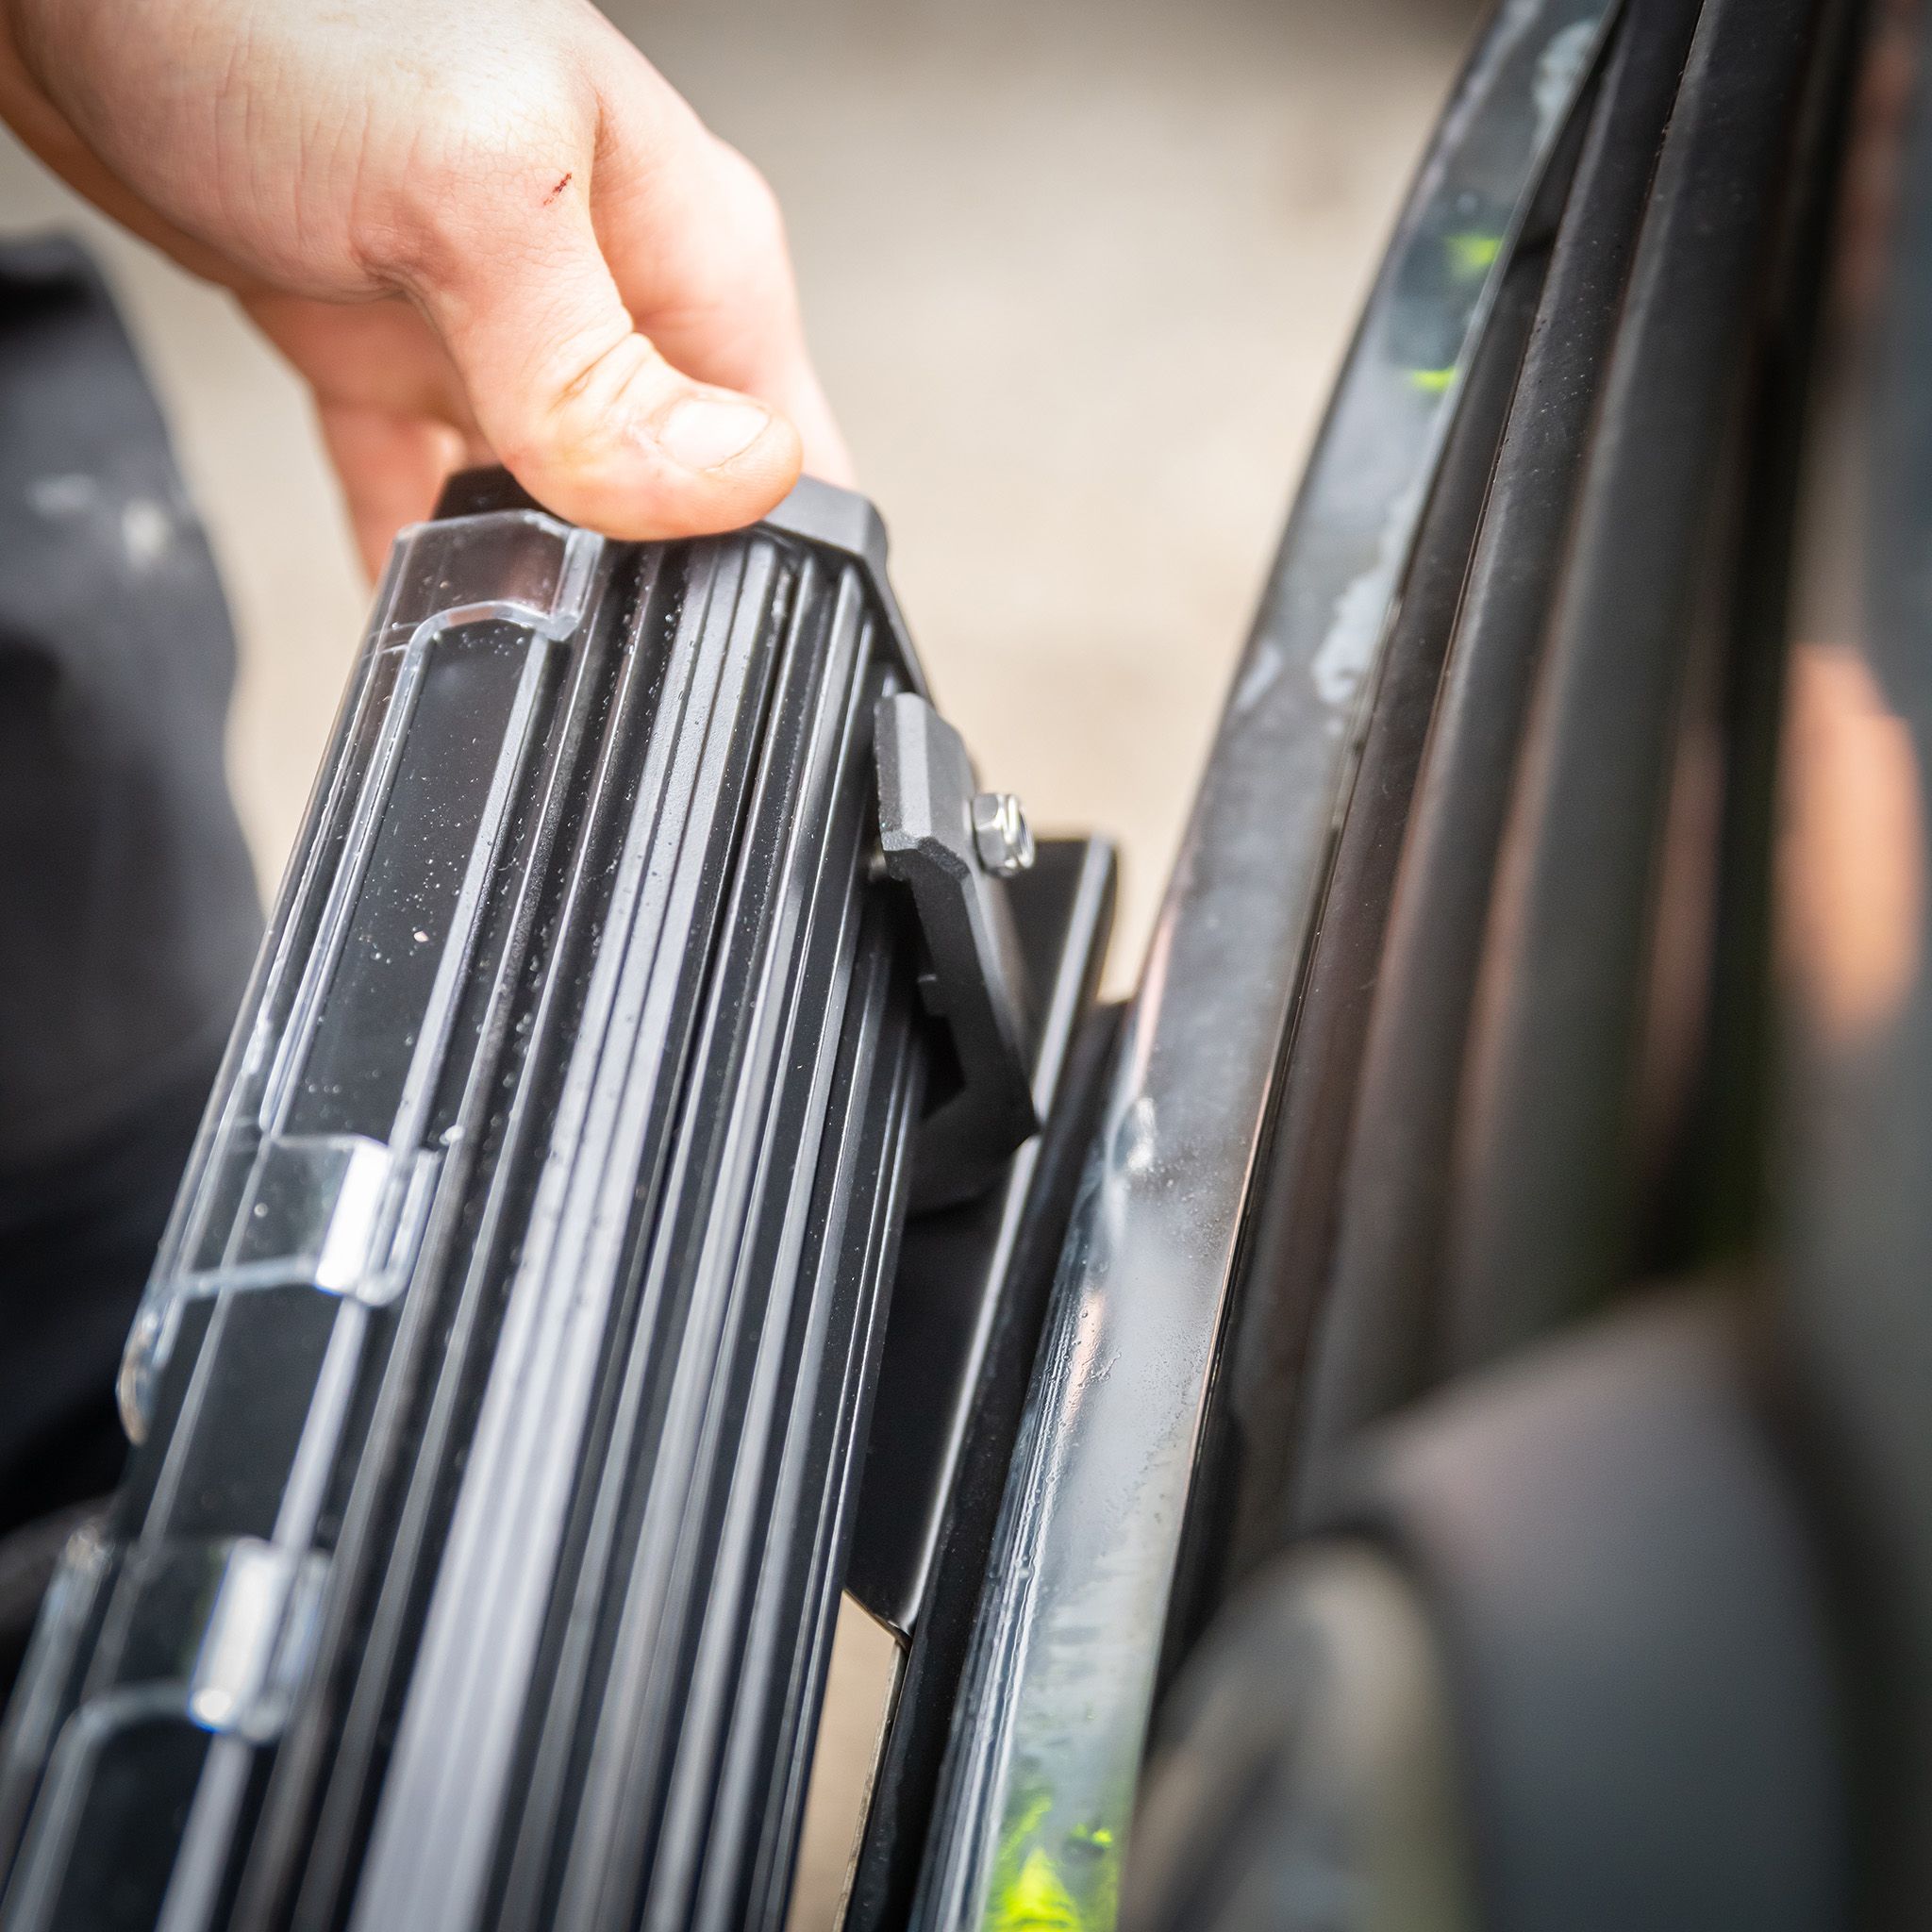
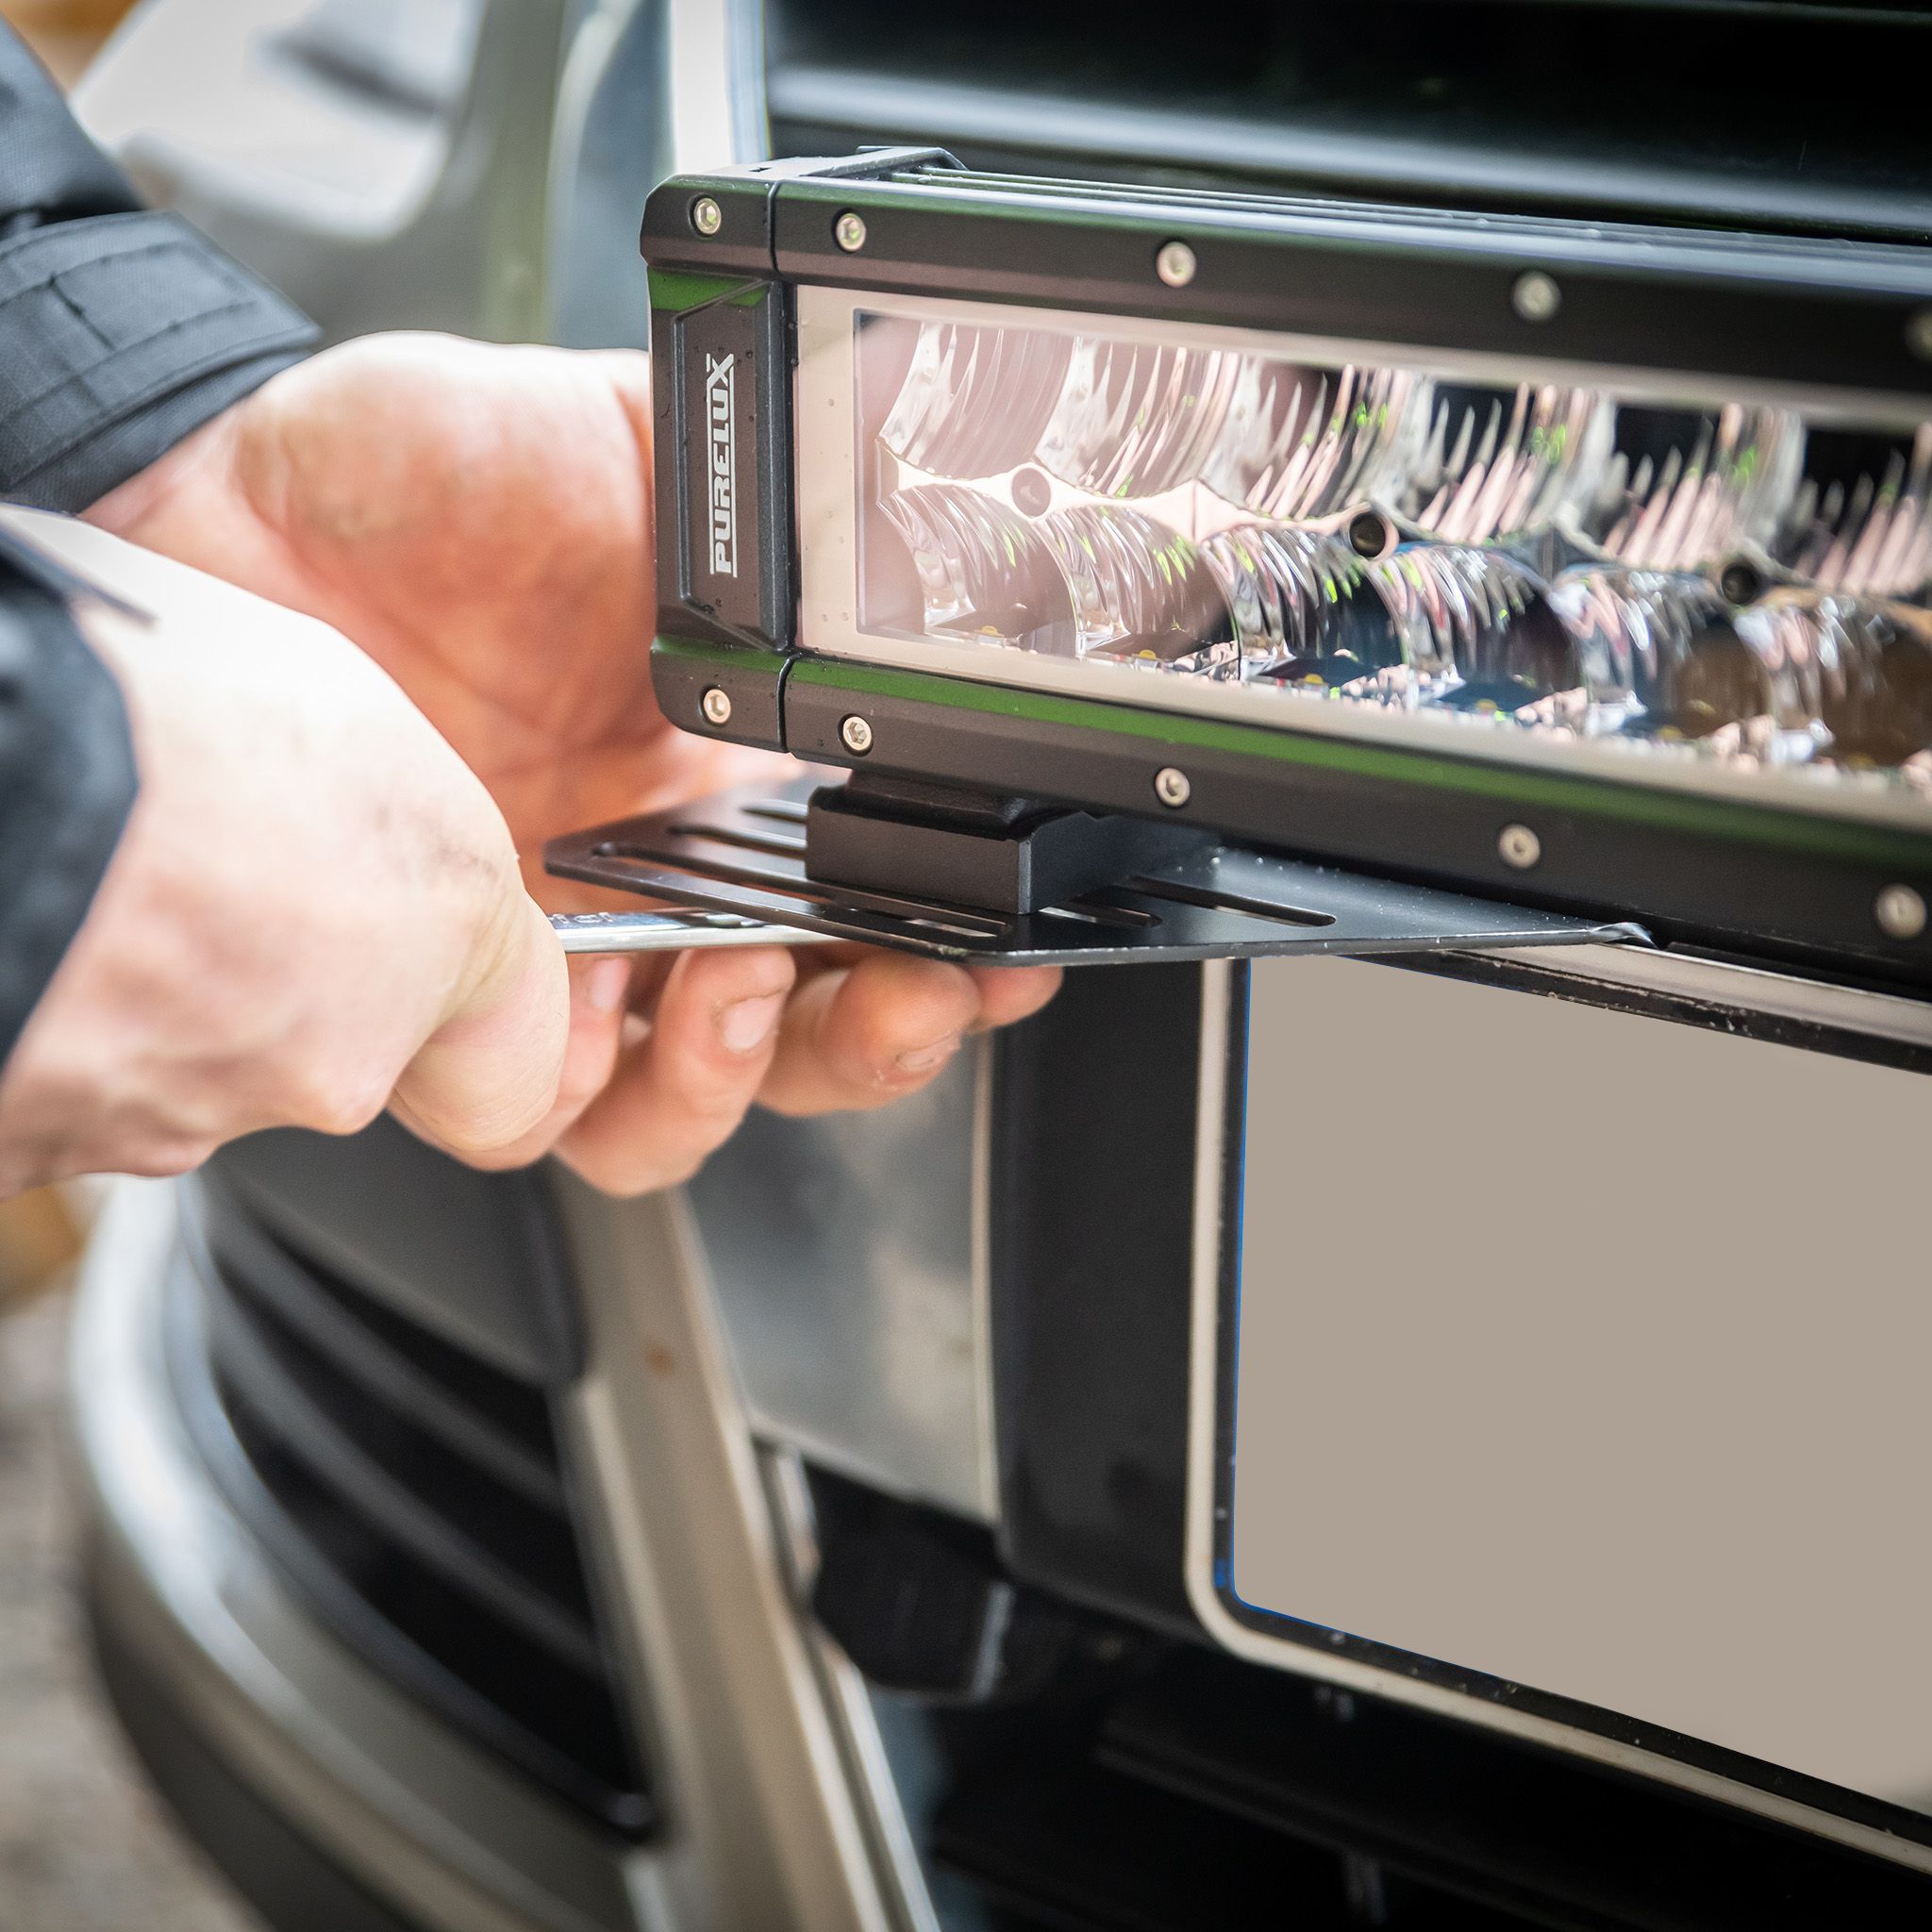
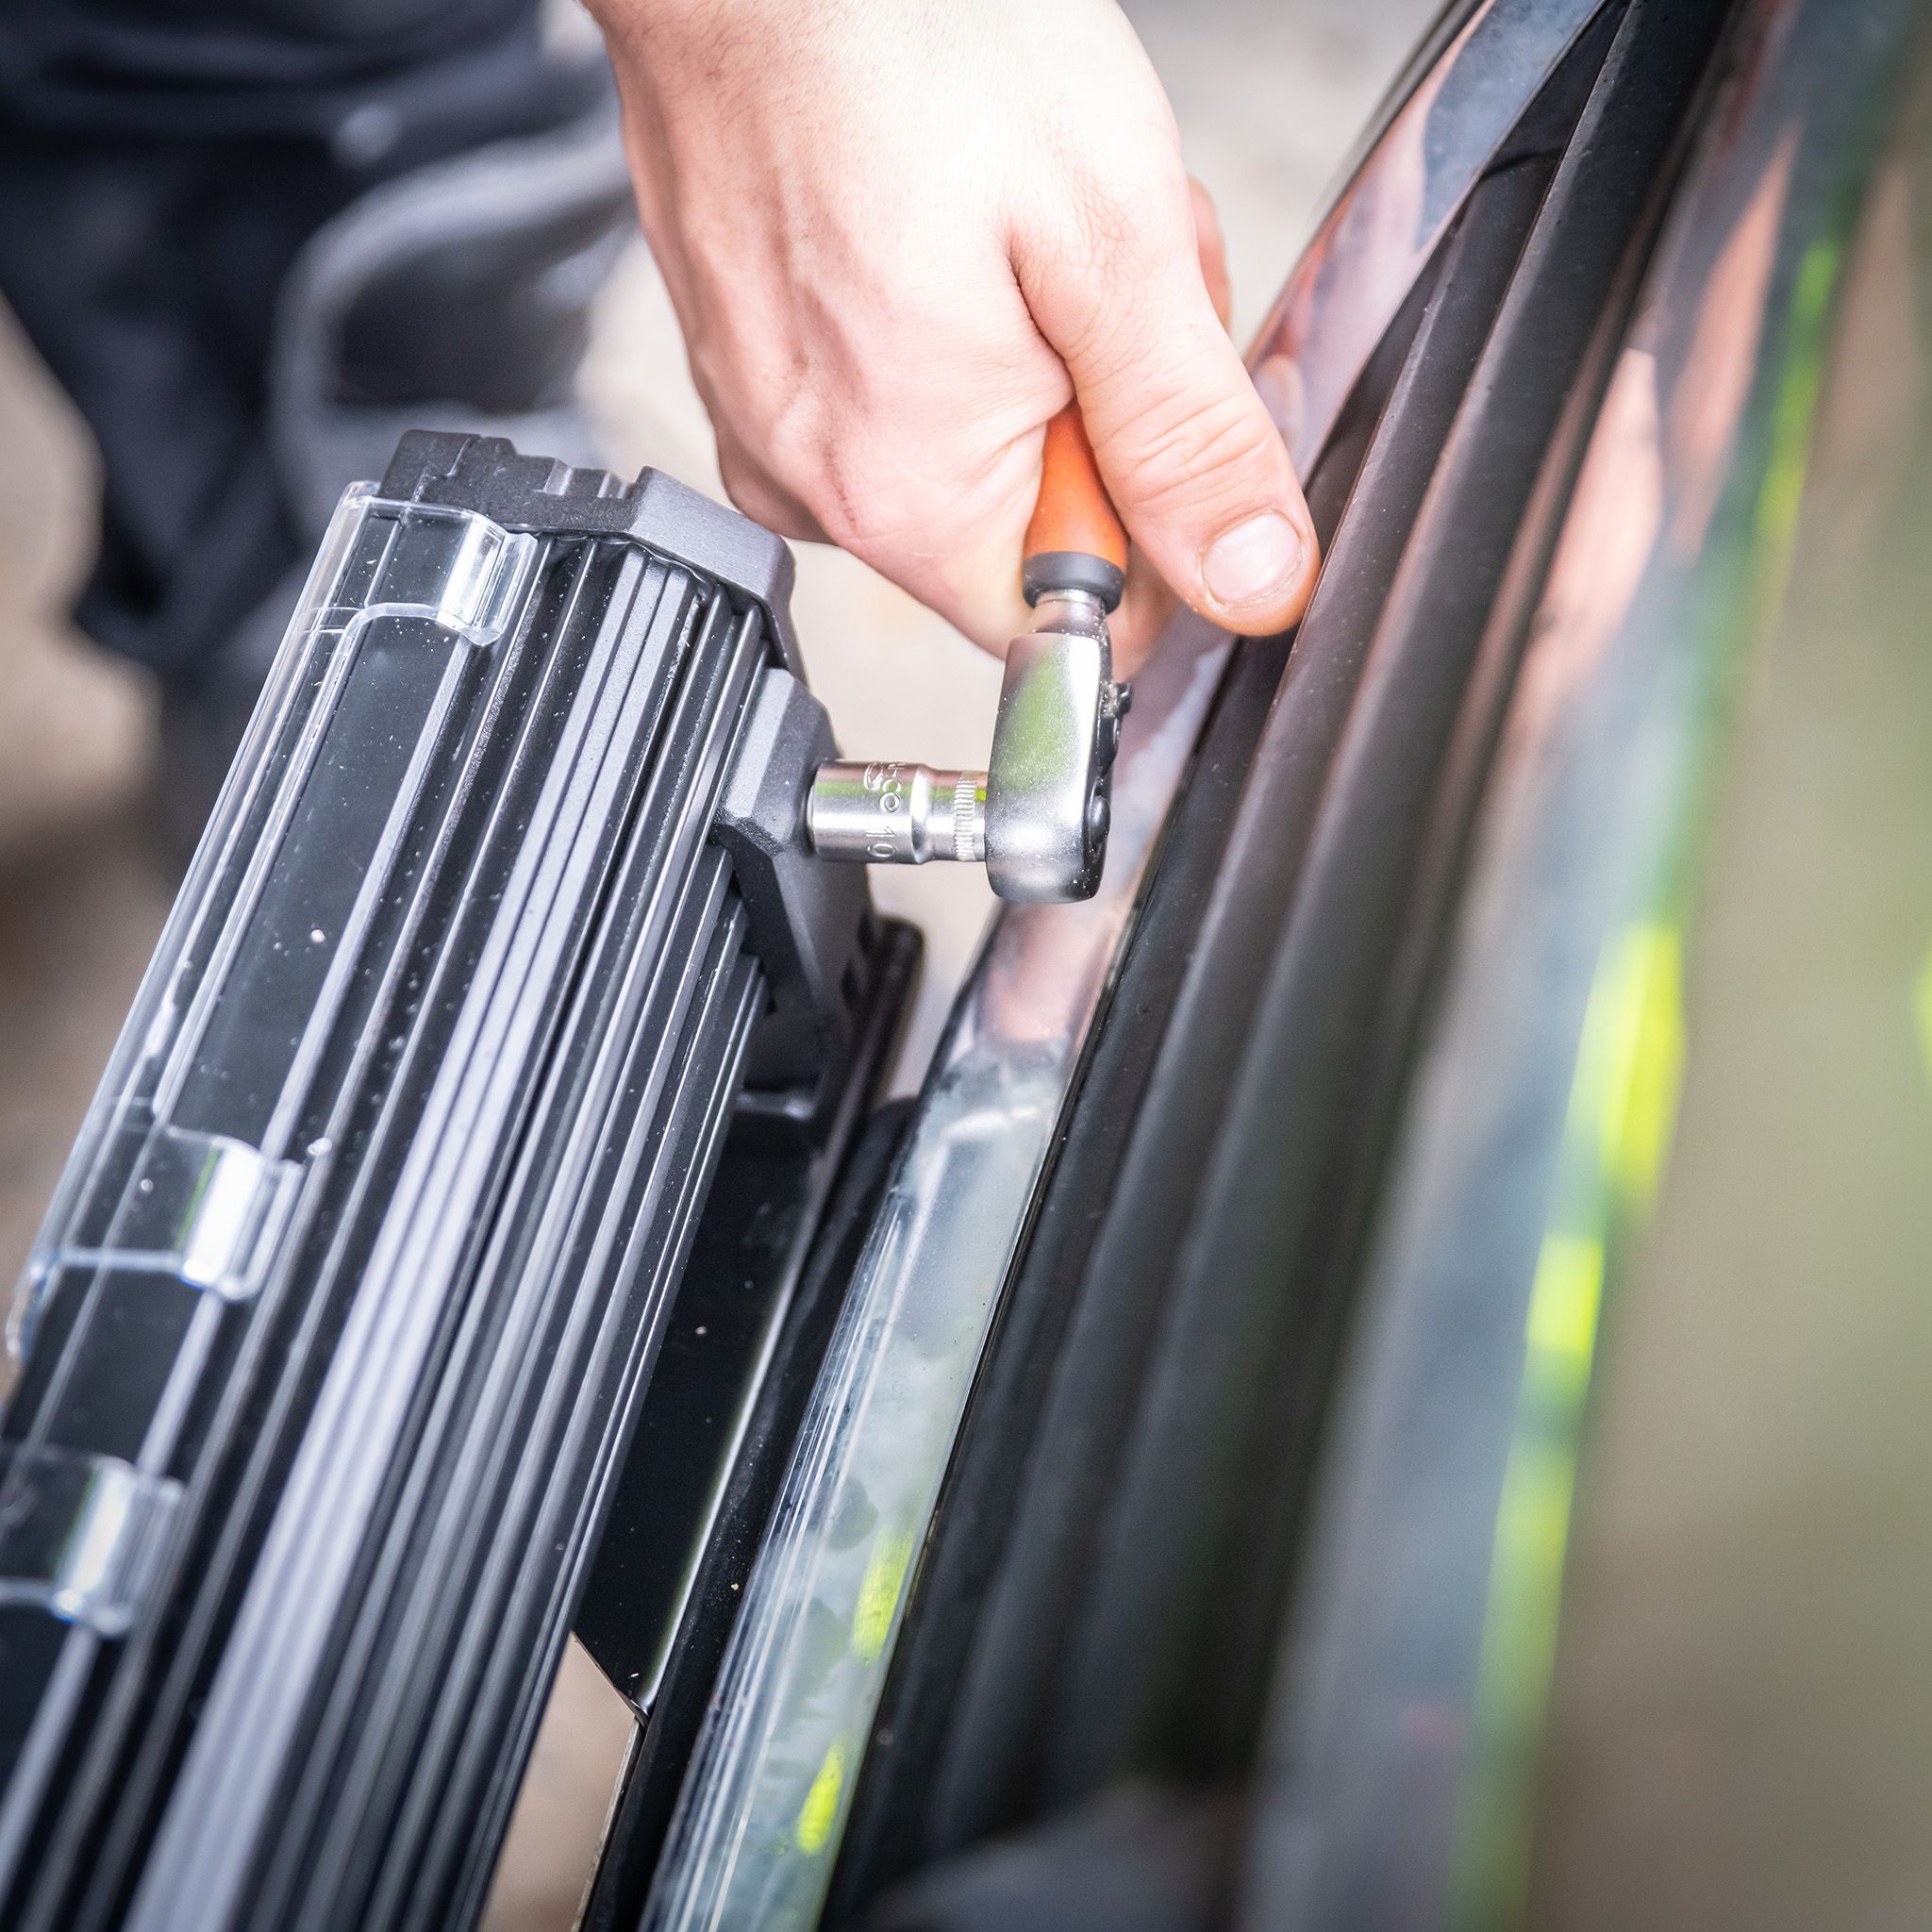
2. Attaching the additional light
Place the light on the bracket and attach it with the bolts provided. You can leave the bolts a little loose at this stage, as you may need to adjust the lights on a dark road after installation, for example. At the same time, you should already have a suitable route for the light cable, and run it through the grille to the engine bay,.
(If the light requires support bars, attach them at this stage as well. Usually, the light has its own attachment point for the support bar, to which one end of the support bar is attached. The other end is attached to the car's bumper or grille in a suitable place with a small screw.)
Finally, attach the license plate back in place. The easiest way is to attach the plate directly to the bumper with screws, which will give the bracket one extra pair of screws to support the attachment.
TIP! For led bars, it is best to first install the mounts in the bar, and then attach the entire light to the bracket. With round lights, it is often easier to first install the light's mounts to the stand, and only then attach the light itself to the rails.
3. Connecting the auxiliary light
Once the lamp has been installed in place on the front of the car, we can move on to perhaps the most challenging phase of the installation, connecting the wires. The easiest and quickest way to connect the wires is to use a ready-made relay wiring harness and take the signal current from the car's own high beams using a traditional jumper connection. This works in practically all cars with halogen bulbs for the high beams. In newer cars with either xenon or LED bulbs for the high beams, the signal may need to be connected differently. More on this at the end of the article. This guide focuses on the basic installation in a car with halogen lights.
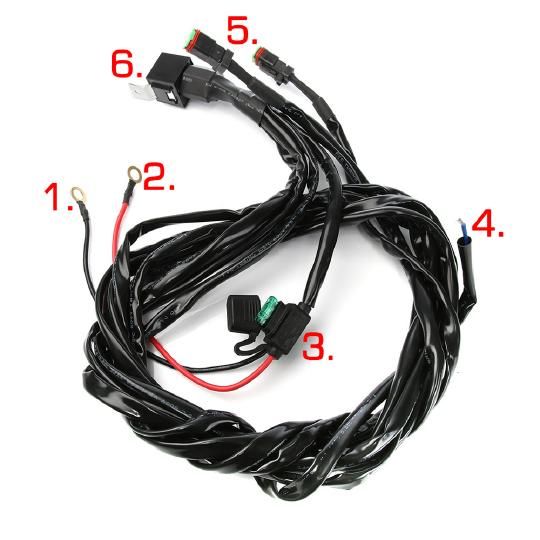
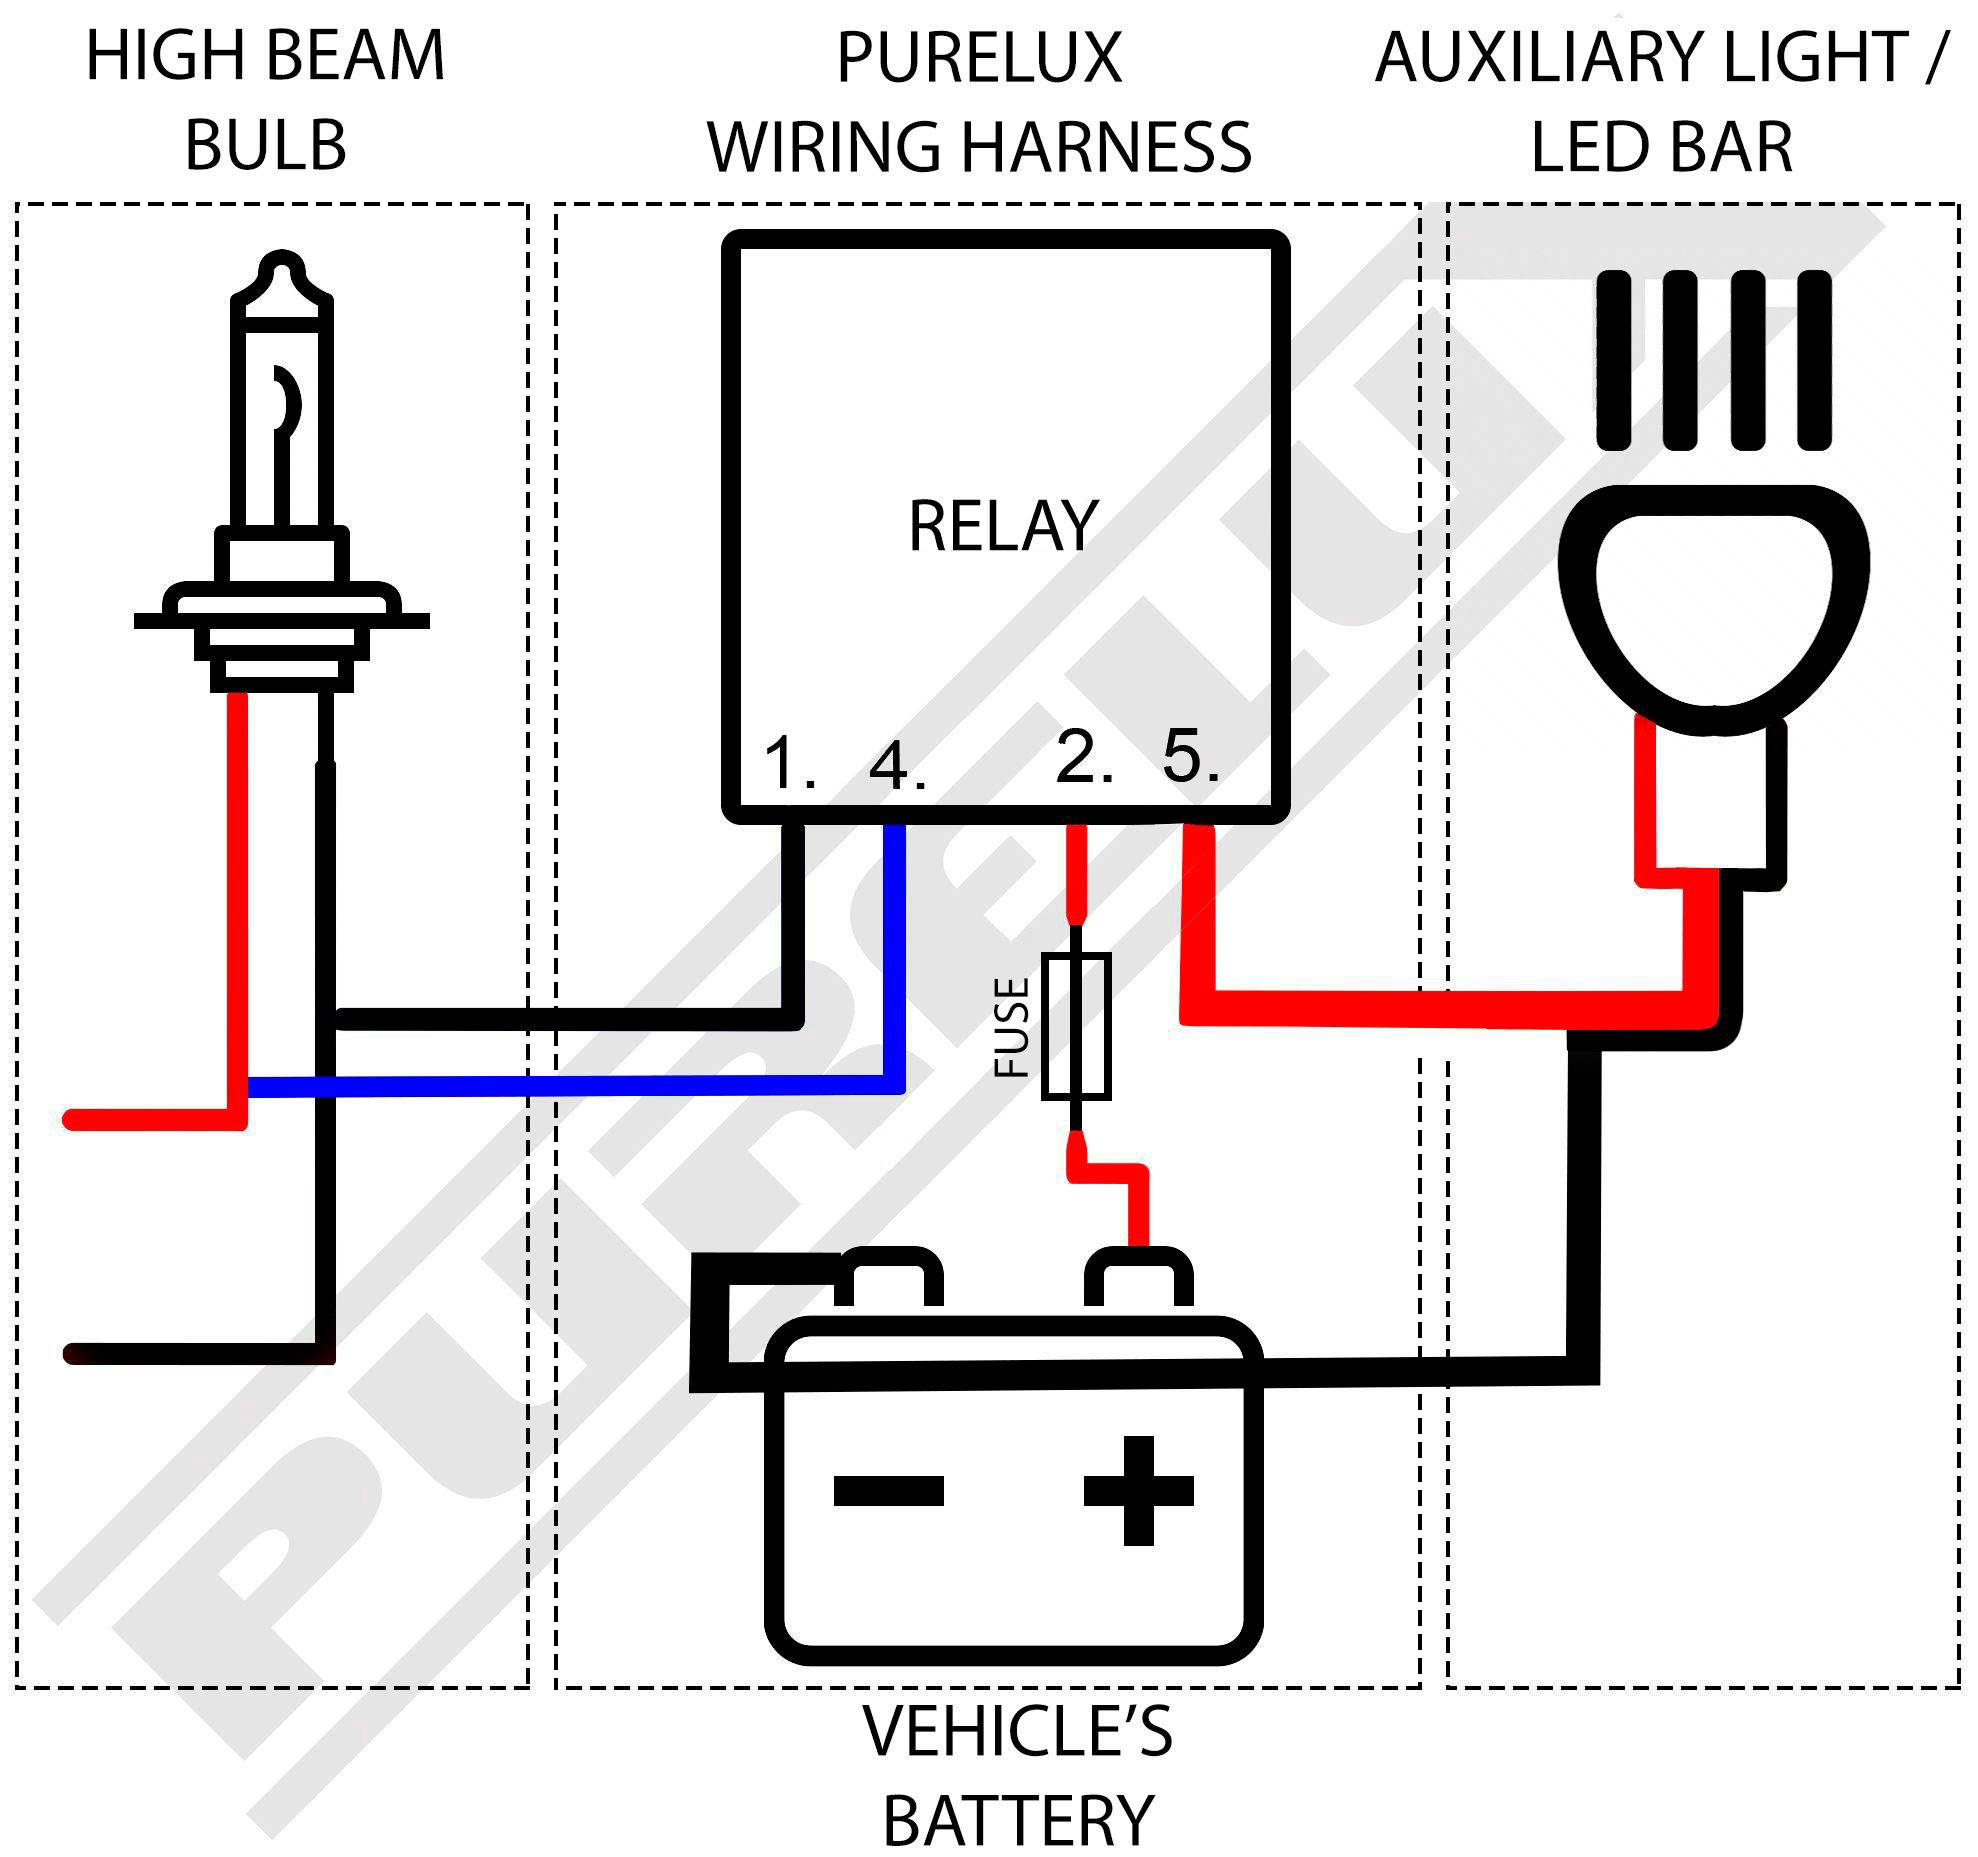
First, the following components should be identified from the relay wiring harness:
1. Minus pole (ground, connected to the car body or the battery's minus pole)
2. Plus pole (power, connected to the battery's plus pole or to a power outlet in the engine room. If the battery is located somewhere other than the engine compartment, there is usually a pre-wired place in the engine room for power)
3. Fuse
4. Signal wire (If you want a switch inside the car that can separate the operation of the additional light from the operation of your own lights, we recommend placing the switch on this wire.)
5. Auxiliary light wires (depending on the wiring harness, there are 1-4 of these. Connect directly to the light connector. If the wiring harness has more than one connector, the remaining connectors can be left empty and placed in a place in the engine room protected from moisture)
6. Relay
4. Connecting the positive and negative poles
Remove the fuse from the wiring harness. Locate the car battery or the power outlet in the engine compartment, and find a suitable place to connect the positive pole. If the battery is not in the engine compartment, but for example in the passenger compartment or the trunk, there is usually a power outlet in the engine compartment that receives constant voltage. The wire is connected with a ring terminal either to the battery's positive pole locking bolt under the nut, or to a similar place on the power outlet. Loosen the bolt, place the wiring harness's positive wire on the bolt and tighten the bolt back.
After this, the negative pole is connected either to the battery's negative pole (similar to the positive pole, under the nut/bolt) or to some point on the car's frame where the wiring harness can be grounded. We recommend connecting this to the frame.
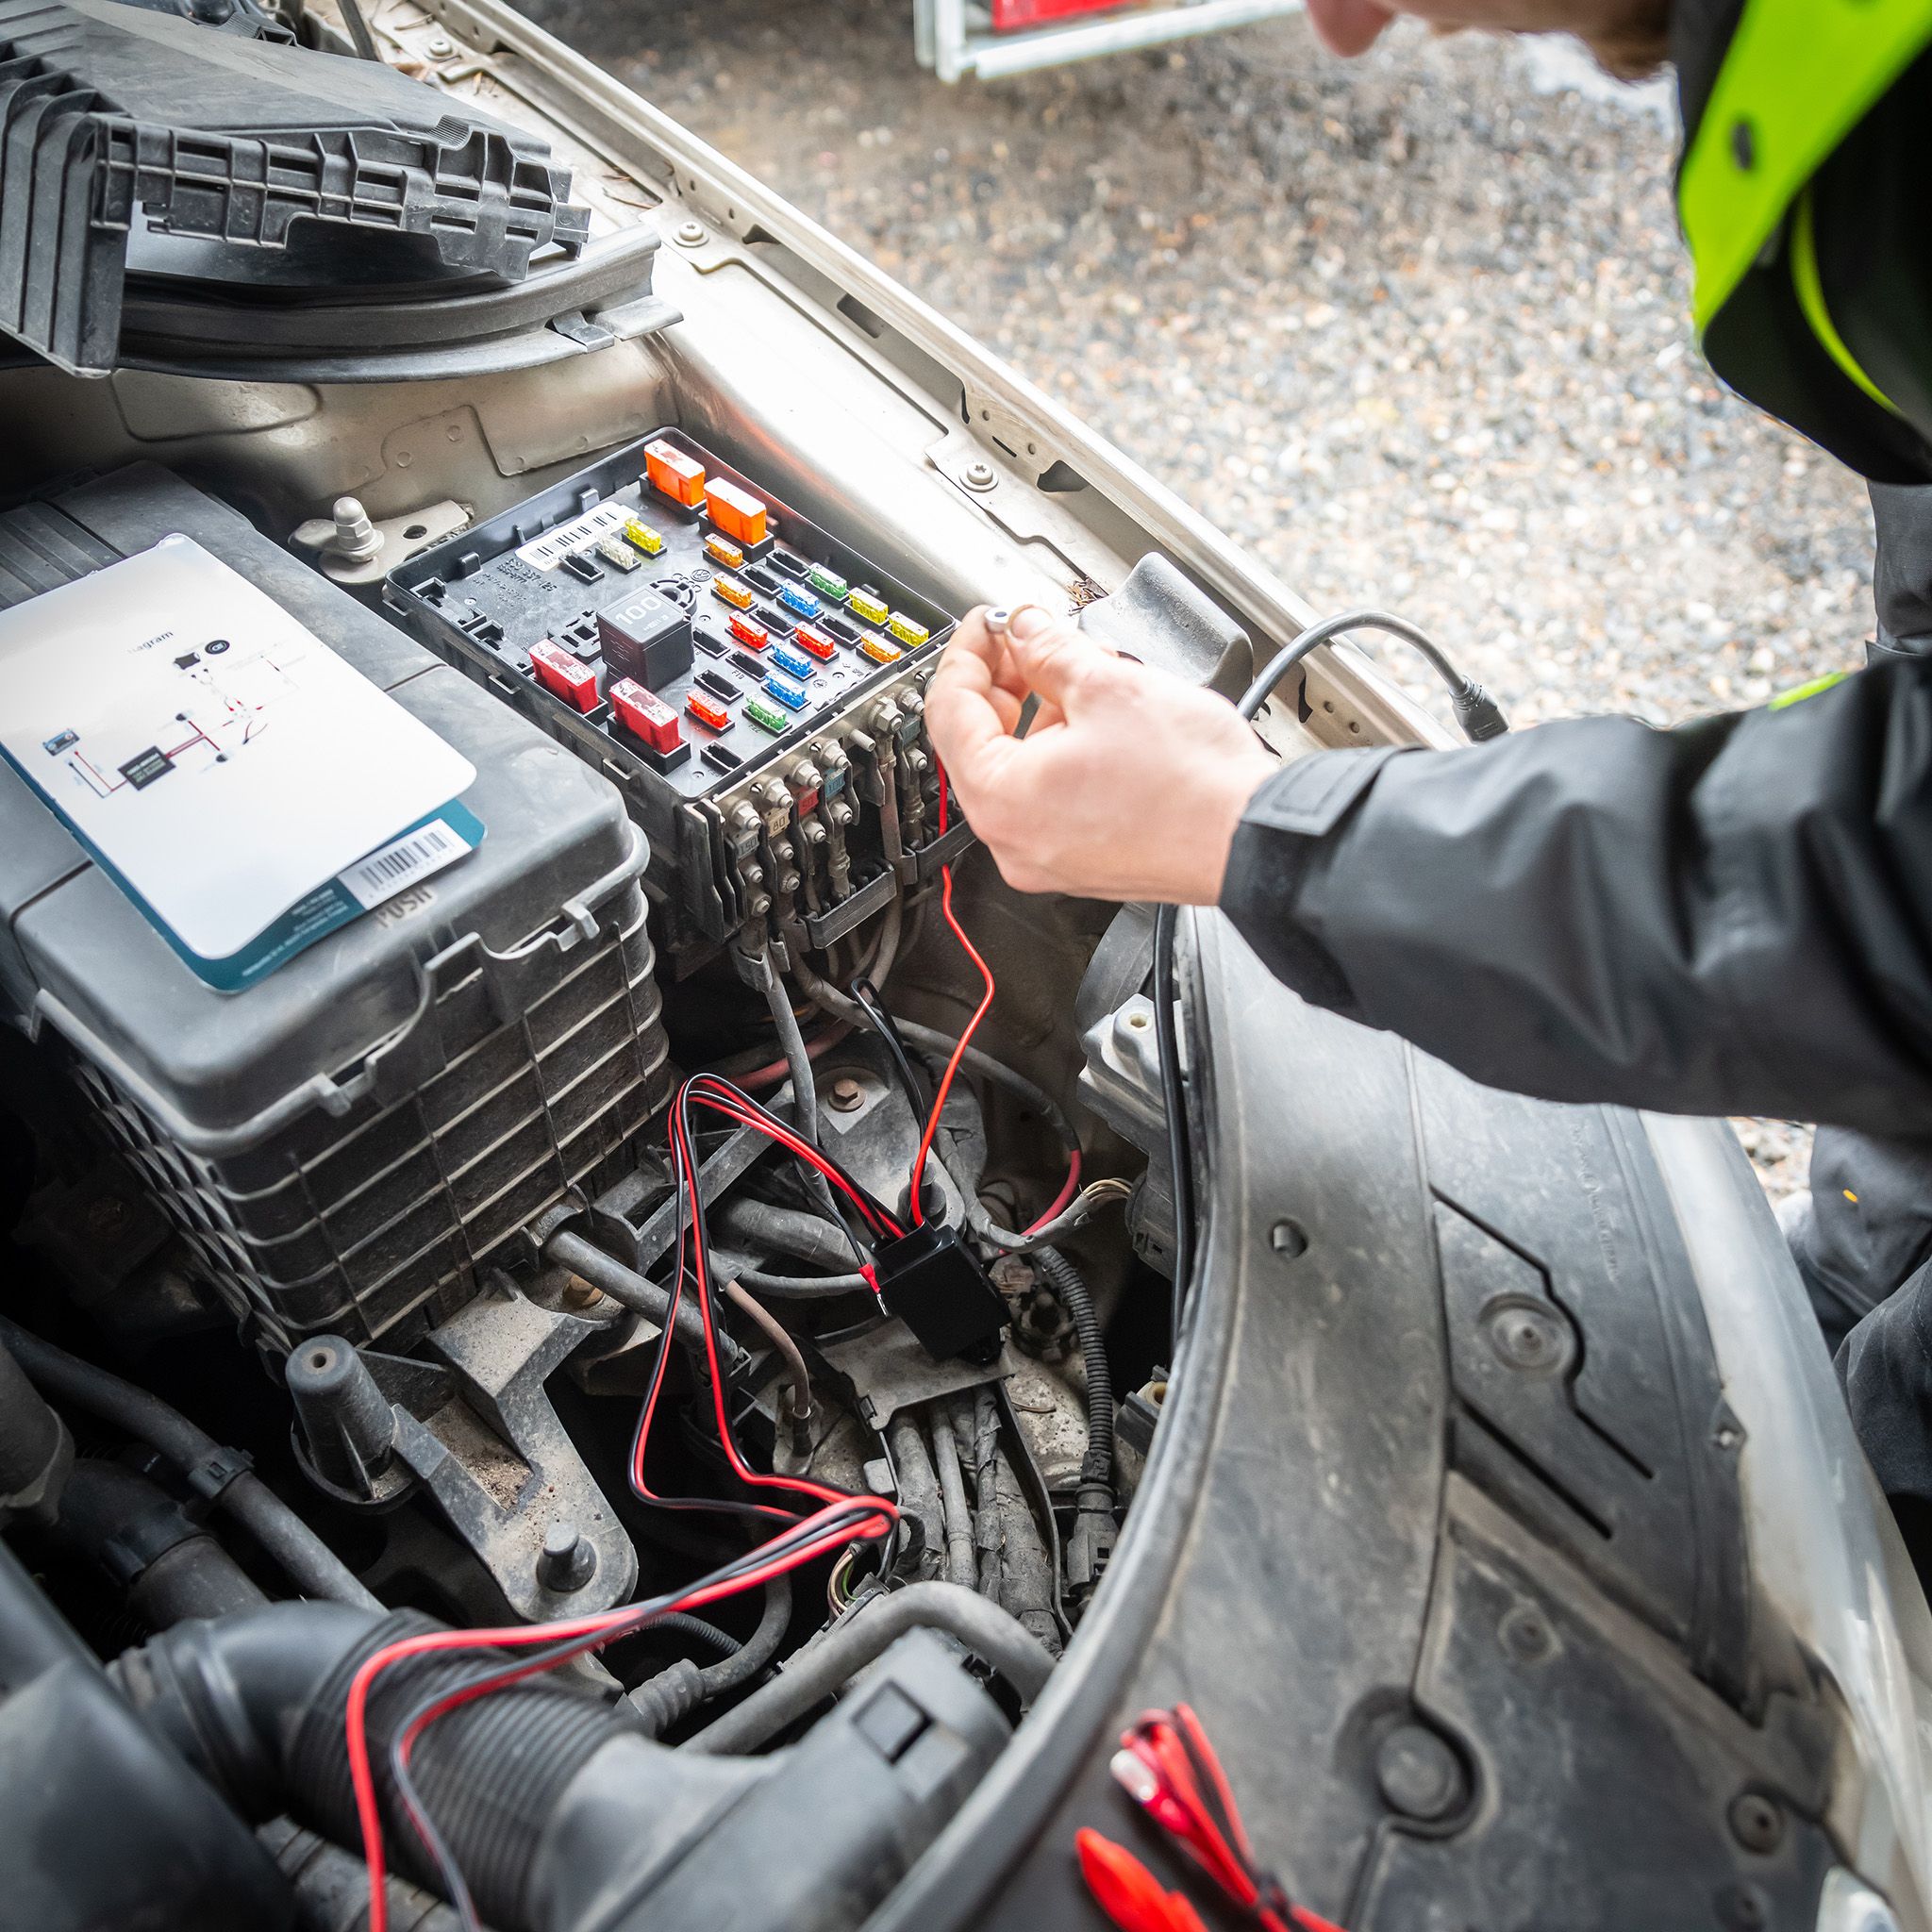

5. Connecting the signal current
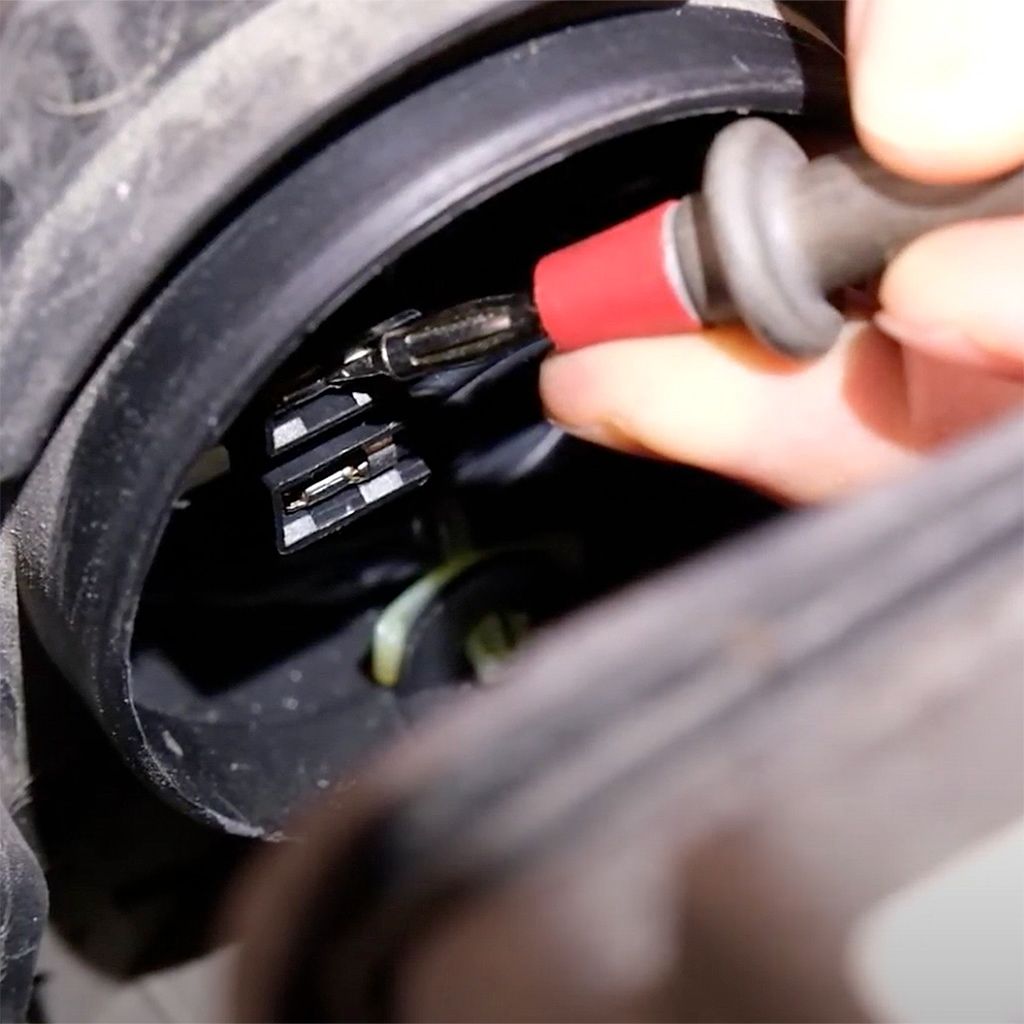
Usually, the signal current is connected to the positive wire of the car's high beam bulb. The correct wire can be verified with a multimeter, and a friend is a significant help here, as he can turn the high beam on and off while you measure the wires yourself. First, it's a good idea to turn the car's high beam on and use a multimeter to measure which wire has voltage. The correct wire is the one that has voltage when the high beam is on, and the voltage is cut off when the high beam is turned off.
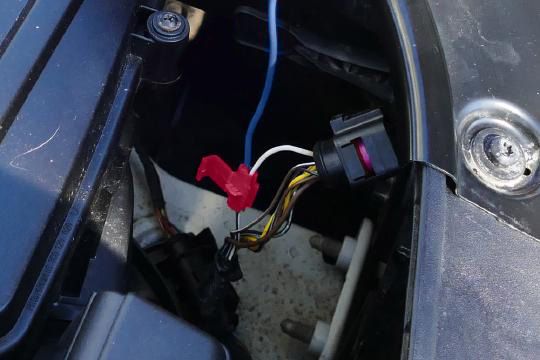
Once the correct wire has been found, place a crimp connector around the wire. Then place the excitation wire of the relay wiring harness into the other slot of the connector, and use pliers to press the metal tab of the connector completely down. Close the plastic cover of the connector.
NOTE! In many new cars (especially cars equipped with LED and some xenon lights), the lights are controlled via the CAN bus, so a traditional excitation is not readily available. In these cases, the installation is slightly different, more information can be found below and at this link: Where should I get the excitation current?
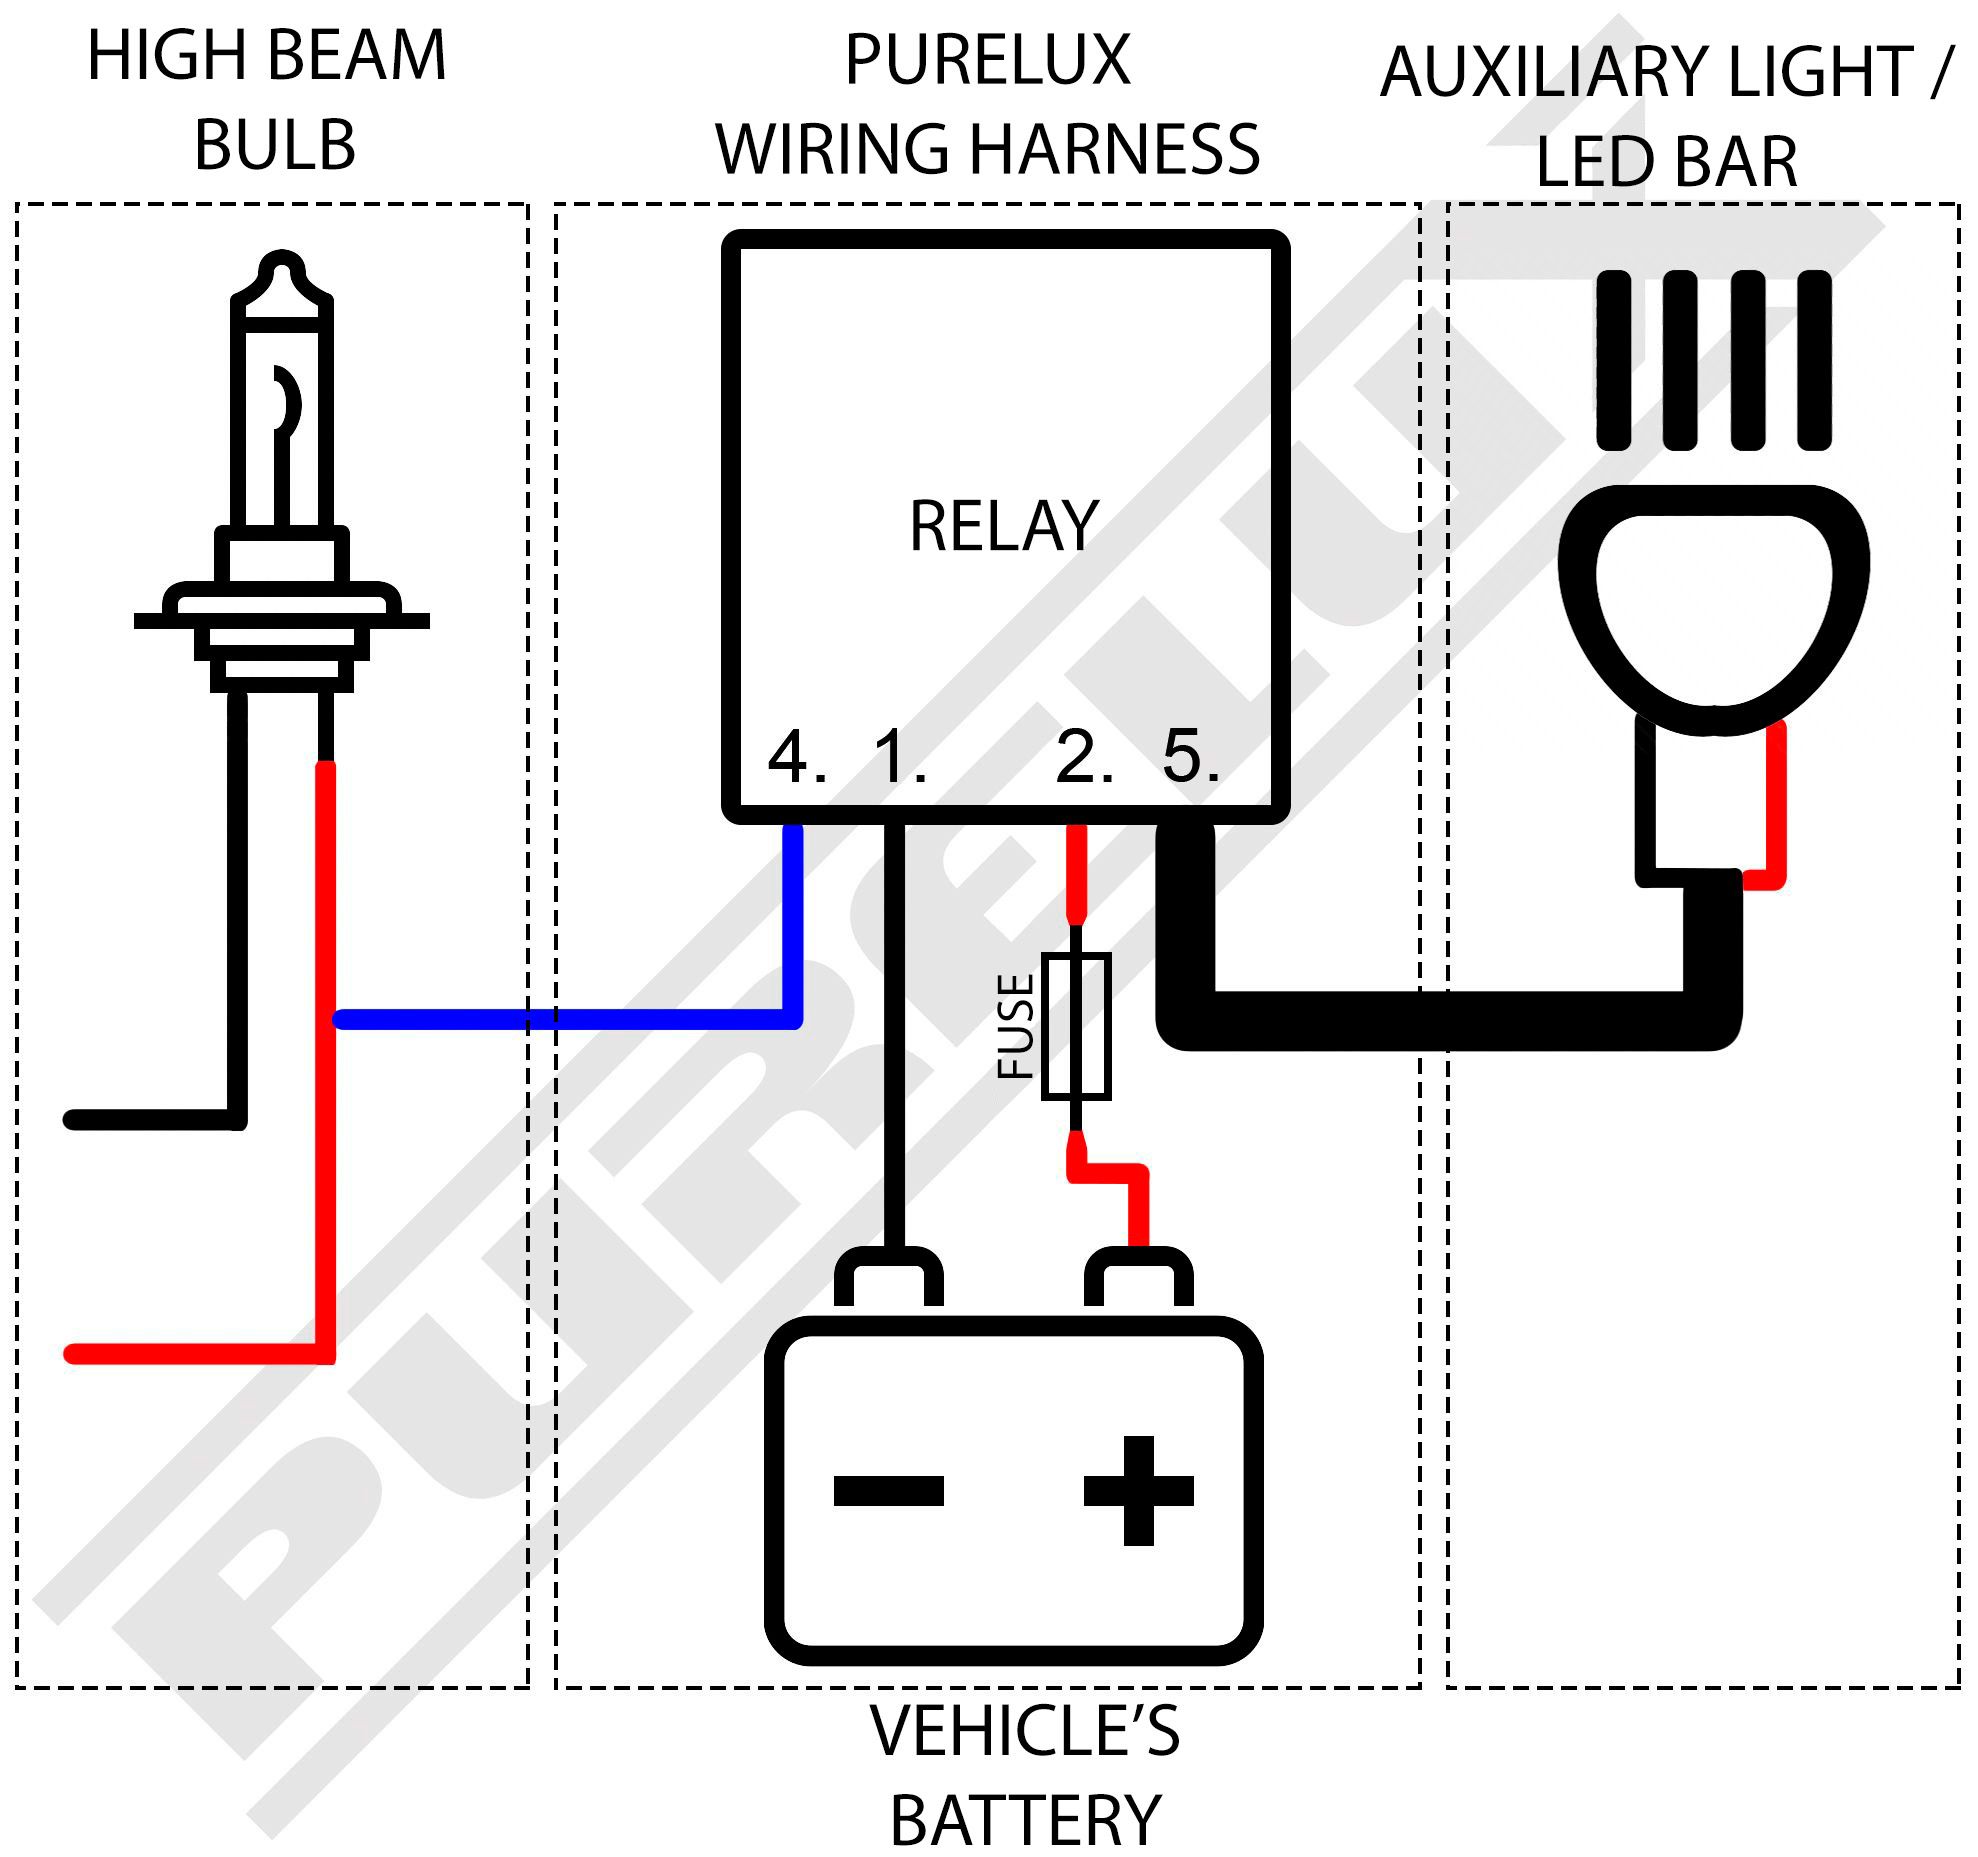
NOTE! In some cars, the original high beams of the car are so-called minus-controlled, i.e. the high beam is continuously energized, and only the ground (minus) of the high beams is disconnected when the high beams are turned off. In this case, the wiring described above does not work, but the auxiliary lights are constantly on and using the car's own high beams has no effect on the additional lights turning on or off. In a "minus-controlled" car, the auxiliary light wires are installed so that the positive wire of the wiring harness is connected to the battery or a free power outlet, and the black, originally ground wire is connected to the negative wire of the car's high beam using a jumper connection. The excitation wire of the wiring harness is connected to the power wire of the car's original high beams using a jumper connection. In addition, the wires coming from the relay to the auxiliary light are stripped open, and the negative (ground) wire coming from the auxiliary light is cut off and connected to the chassis or the negative terminal of the battery. The positive wire may remain connected to the relay.
This way the auxiliary lights will turn on and off at the same time as the car's own headlights. If the auxiliary light is constantly on when installed with a traditional connection, you should try installing the wiring harness as described here. These lights can also be called ground-controlled.
The wiring diagram shown below is the connection for negative-controlled lights. The corresponding wiring diagram for a traditional connection can be found above.
6. Wiring and testing
Once the connections are complete, replace the fuse in the wiring harness and connect the auxiliary light wire to the relay wiring harness connector. Test the lights for proper operation. If everything is in order, bundle the excess wires into a neat bundle and secure the bundle in a suitable location in the engine room, protected from moisture.
If the lights do not come on, check the following:
- all connections are tight
- to ensure the light is working by testing it and connecting it directly to the battery
- Make sure that the excitation current is taken from the correct wire and that the metal tab on the jumper connector is pressed all the way in
If the auxiliary light is on continuously:
- Make sure that the lights are not so-called negative-controlled (see section 5 - connecting the excitation current)
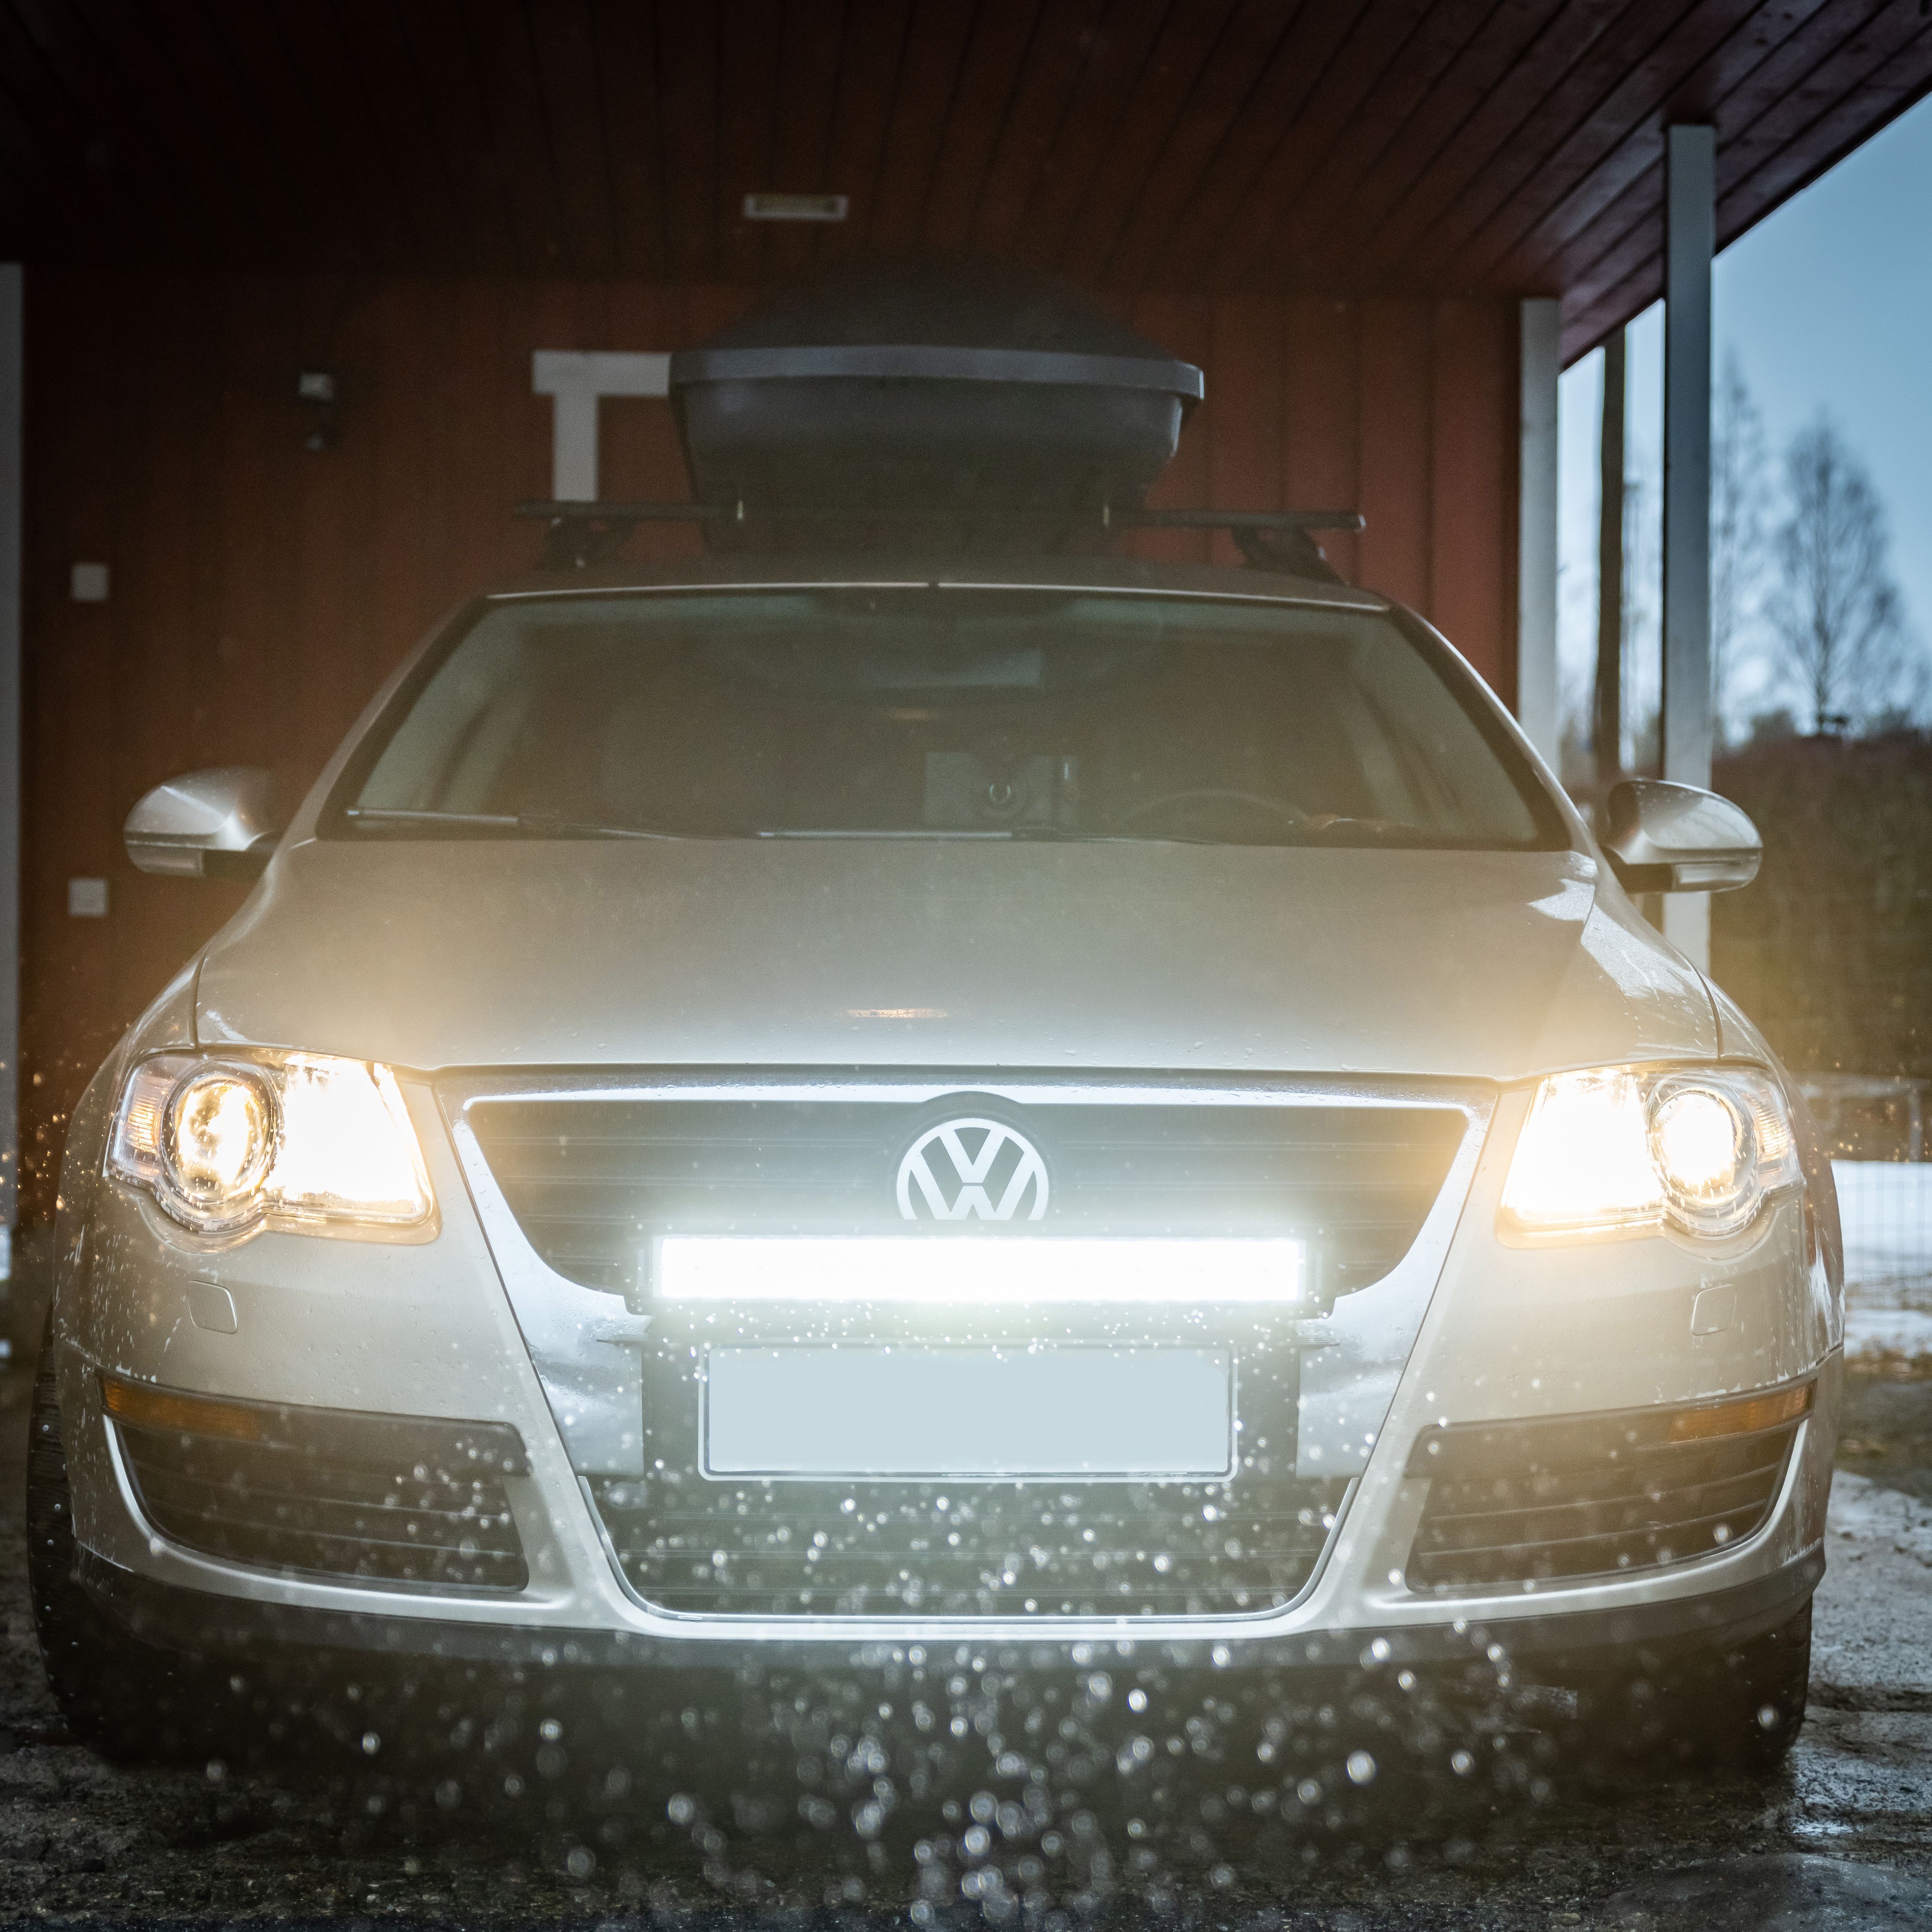
7. Directing the auxiliary lights
Once the installation of the lights is otherwise complete, wait until evening and darkness falls. Find a suitable, dark place (e.g. a road or other similar open area). Switch on the additional lights and direct them to point straight ahead.
A light directed too low will illuminate too much near the front of the car, making it difficult to see far. A light directed too high will illuminate the treetops, but will not illuminate the road itself at all. If there are several additional lights, it is worth directing their beams next to each other, which will broaden the beam considerably laterally. A good rule of thumb for directing the lights is to set them to point straight ahead. A good tool for this is a spirit level, which is even available in smartphones these days.
8. Connection to cars with xenon or LED bulbs for high beams
(Can-bus controlled high beam)
More information on capturing the excitation current can be found at this link: Where does the excitation current for the auxiliary light come from?
If the car's high beams are equipped with xenon or LED bulbs, it may not be possible to connect the auxiliary lights to them using a traditional wiring harness, because the high beams do not necessarily have a continuous 12V voltage from which the excitation current could be captured. This is easy to verify with a multimeter, just like in cars with halogen bulbs. If a wire is connected to the fuse box that carries a continuous 12V voltage when the high beams are on, and which turns off when the high beams are turned off, the connection can be made as described above.
If there is no wire in the fuse box that carries a continuous voltage, it is worth checking the car's service manual to see if there is a separate fuse for the high beams. If there is, the excitation current can probably be captured from it, in which case the connection can be made using a traditional relay wiring harness. If not, the excitation current must be captured from the CAN bus or with an XBB smart relay.
In principle, the XBB relay can be used in all bus-controlled cars. The XBB relay detects even very small currents, so it can usually be used in BI-xenon lights, for example.
In new cars, the high beams are increasingly controlled via the CAN bus, which means that the high beams no longer have their own power cable. If there is no cable in the trunk from which the excitation current can be captured, the excitation is taken from the car's CAN bus. There are practically two routes for installation on the CAN bus:
- The easiest and most popular way to install lights in a CAN bus-controlled car is to use the XBB Dongle: The Dongle is connected to the car's OBD port, from which it reads the information when the high beams are switched on, and sends the information to the relay included in the set, which in turn switches the high beams on. The Dongle requires a wiring harness as a companion. More information and installation instructions can be found on the product page: XBB Dongle + Powerunit
- A slightly cheaper, but more laborious way is to use a "smart relay" that can be connected directly to the CAN bus wires for CAN installation. The relay's installation instructions can be found on its product page: Can relay. The CAN relay also always requires a standard wiring harness, so this relay is ONLY for taking the excitation current.
If you have any questions, Valostore's customer service will answer your questions via chat, email and phone.
Shop reviews
4.6
Based on 159460 reviews- Oikein tyytyväinen, ostan jatkossakin...Oikein tyytyväinen, ostan jatkossakinJussi S 14.5.2026

- Snabb leveranstid ...Snabb leveranstidN H 14.5.2026

- Nopea toimitus...Nopea toimitusLeila K 13.5.2026
- Auttoivat vika jutussa verkkomaksuissa....Auttoivat vika jutussa verkkomaksuissa.Jouko H 13.5.2026
- Hyvä palvelu...Hyvä palveluJouko H 13.5.2026
- Nopea toimitus...Nopea toimitusRauno P 13.5.2026
- Selkeä....Selkeä.Jari H 13.5.2026
- Handlar mest på nätet....Handlar mest på nätet.Carl patrik rafael B 12.5.2026
- Snabb bra leverans och service i vanlig ordning....Snabb bra leverans och service i vanlig ordning.Mattias S 11.5.2026
- Hyvät verkkosivut ja nopea toimitus....Hyvät verkkosivut ja nopea toimitus.Seppo R 11.5.2026
Easy and Safe Shopping
You can pay for the order safely and easily with Credit Card, Klarna, Paypal, Google Pay or Apple Pay. Shipping costs starts at only 7.90€. We use UPS and GLS for shipping.
Fast Delivery in 3-7 days (DHL/UPS/GLS)
Products in stock are normally shipped out within 1-2 working days. We process orders continuously and orders placed before 13 are normally sent at the same day. The shipment takes usually 3-7 days in Europe.
100% Satisfaction Guarantee
We want you as a customer to be 100% satisfied with your purchase. That's why we offer 30 days to return the products if you are not happy with it! Safe and carefree shopping at its best!
![]()
THE BIGGEST AND CHEAPEST LIGHT STORE IN THE NORDIC COUNTRIES
Lighting fixtures and their associated accessories are in a constant state of evolution - and so is our product selection. Within the VALOSTORE online shop, you will always discover the most cutting-edge auxiliary lights, headlamps, work lights, and handheld flashlights, along with top-tier accessories available in the market. Valostore boasts its very own light measurement laboratory, ensuring that we provide accurate information regarding the actual luminous output and other performance-related metrics of our fixtures. We warmly invite you to explore the VALOSTORE online shop and indulge in a shopping experience like no other!
VALOSTORE.COM
Handshake Finland Oy
VAT: FI23041120
Alasintie 9, 90400 Oulu
WHAT WE OFFER
- The best brands in the lighting industry
- Satisfaction guarantee
- 30-day right to return
- Safe payment methods
- Fast deliveries
- Free delivery across Europe on orders over 229 €. Free returns on all orders.
- Note: "UPS - Delivery across Europe"

© 2026 Handshake Finland Oy | Privacy statement